Snapshots are a really useful way of making your data load more quickly or observing the way that your data has changed over time.
If your query takes a long time to process due to lots of filters, formulas, summarisations or joins to other datasets, it can be helpful to create a Snapshot, particularly if the data in your live query is unlikely to change or you only care about what the data looks like at this point in time. The Snapshot will take your processed data from the query and then use that as its starting point, making loading times much faster.
However, Snapshots do not automatically update like live queries do so if you are interested in the most recent data from your query, you can set your Snapshot to be run at regular intervals. This would ensure that your Snapshot is up to date with any changes in the live live query. This can also be useful for comparing how the data from your live query has changed over a period of time.
Selecting A Stored Query
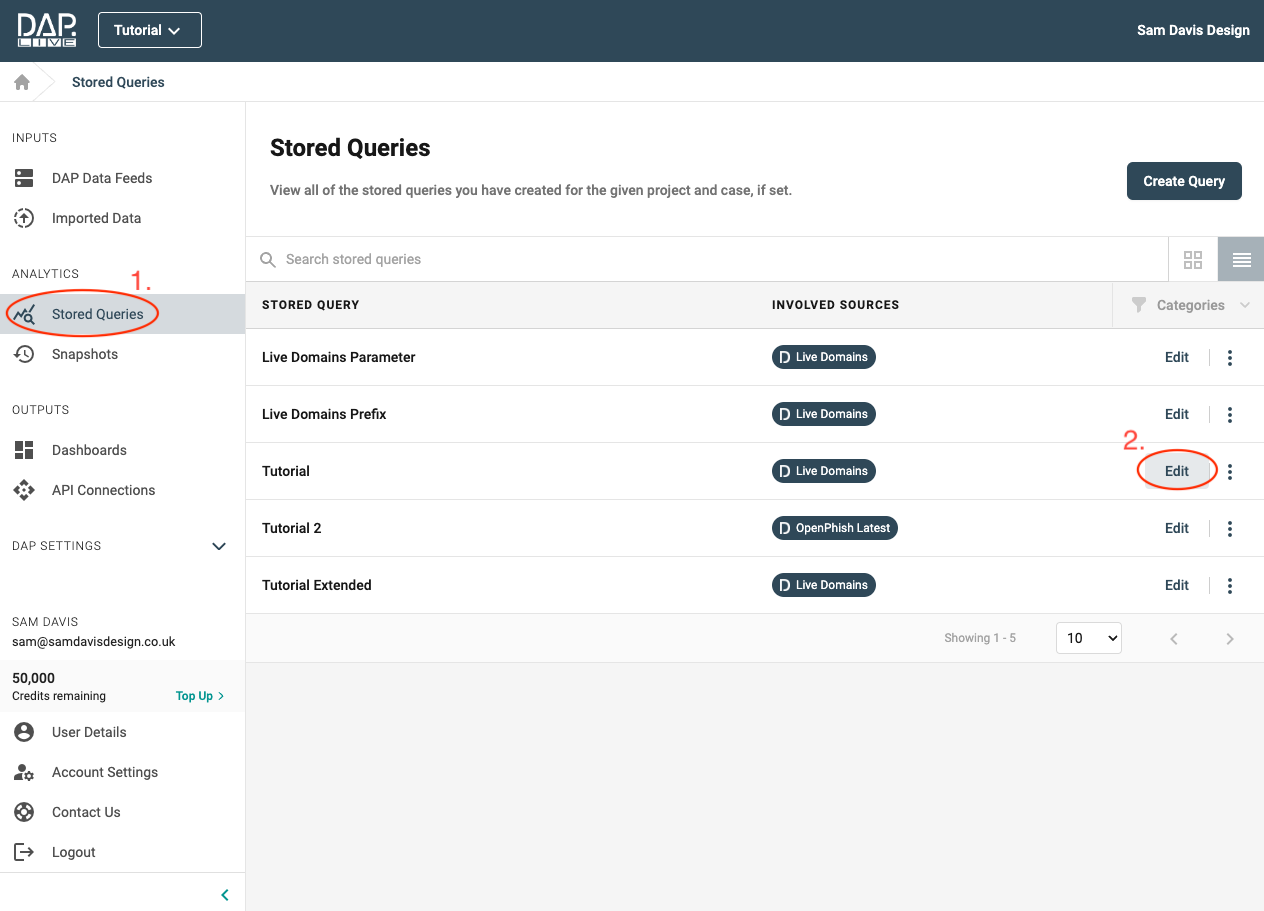
To create a Snapshot from a stored query select 'Stored Queries' on the panel on the left-hand side (1). Then click 'Edit' (2) on the query that you want to base your snapshot on.
Snapshots Icon
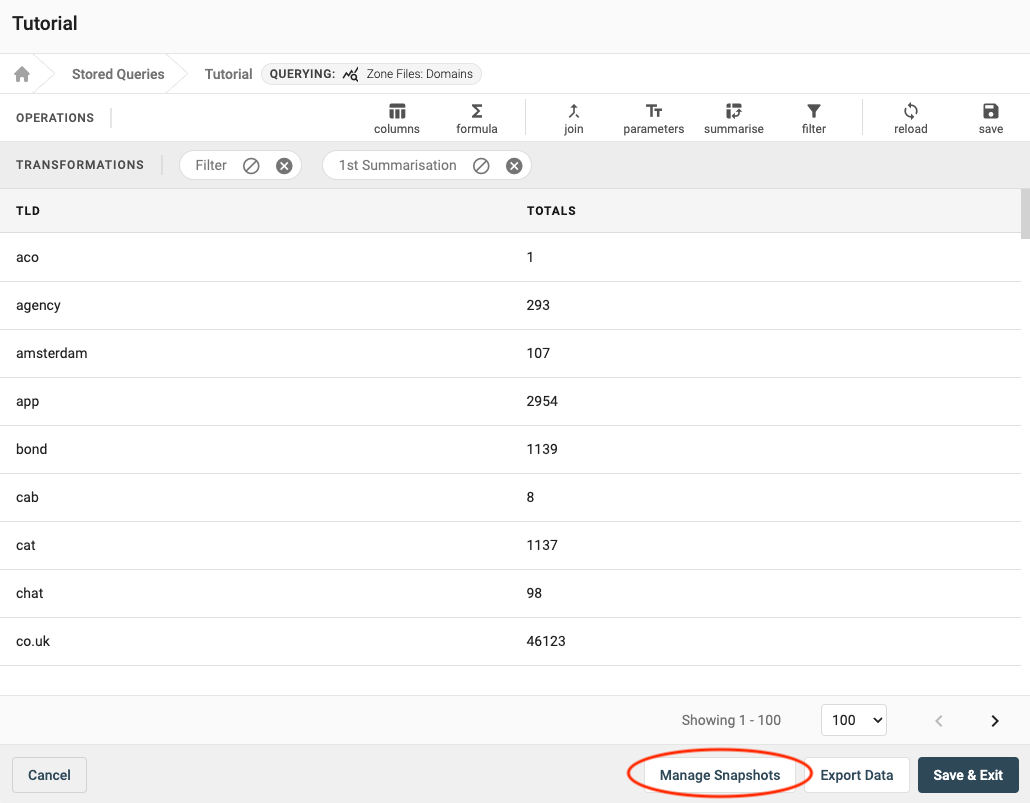
Once your query has loaded, click 'Manage Snapshots' at the bottom of the page.
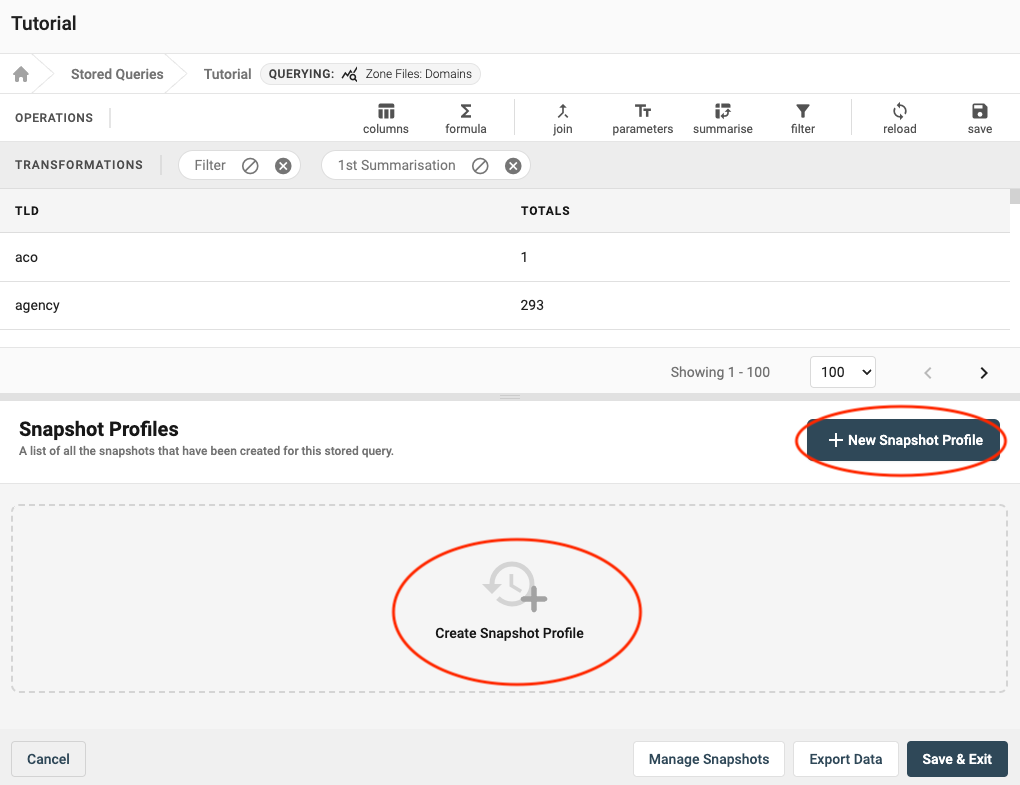
To create your new Snapshot you can either click the large 'Create Snapshot Profile' icon or 'New Snapshot Profile' in the top right corner.
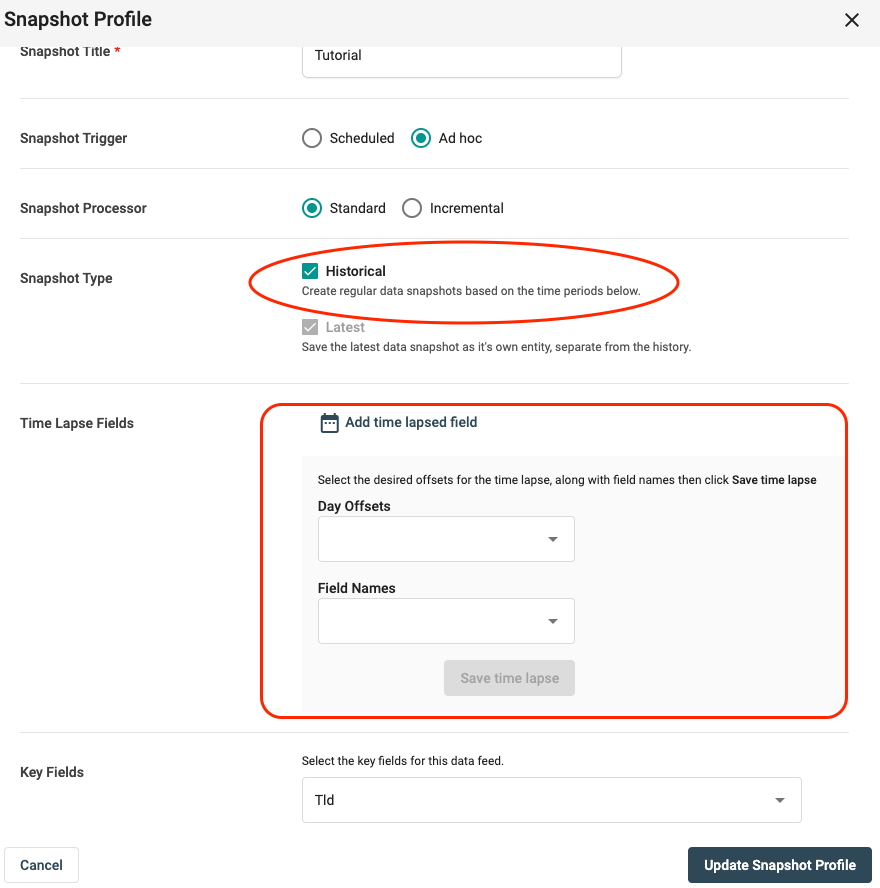
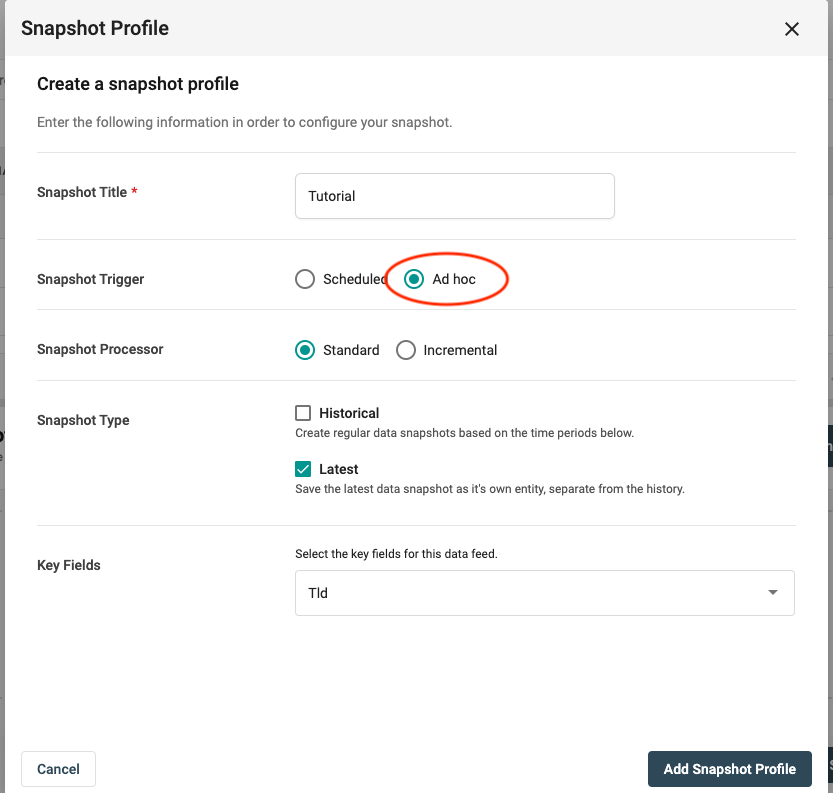
From there, you can title your Snapshot and select any key fields.

Ad Hoc
If you only want to create this as a one time Snapshot, you need to set the 'Snapshot Trigger' to 'Ad Hoc'.
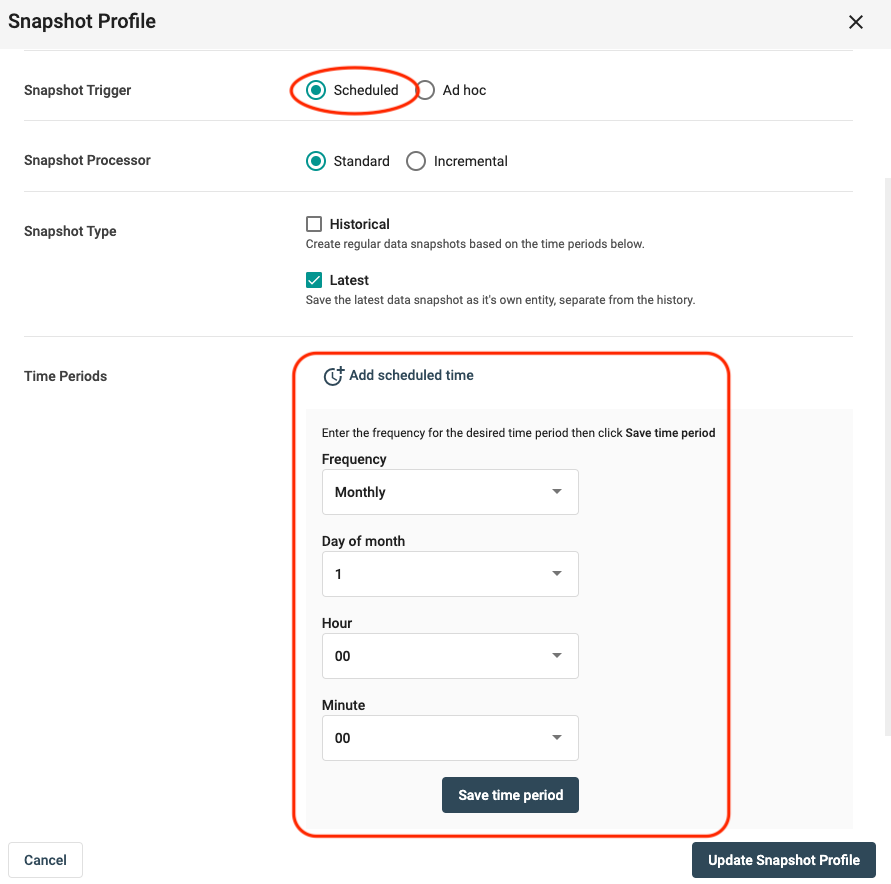
Scheduled
If you want to take Snapshots at regular time periods, you need to set the 'Snapshot Trigger' to 'Scheduled' and select 'Add scheduled time'. From there, you can select whether you want Snapshots to be taken monthly, weekly, daily or hourly and state at what time of day the Snapshot should be taken. This is useful for if your you want to keep your Snapshot up to date with any changes in the live query.
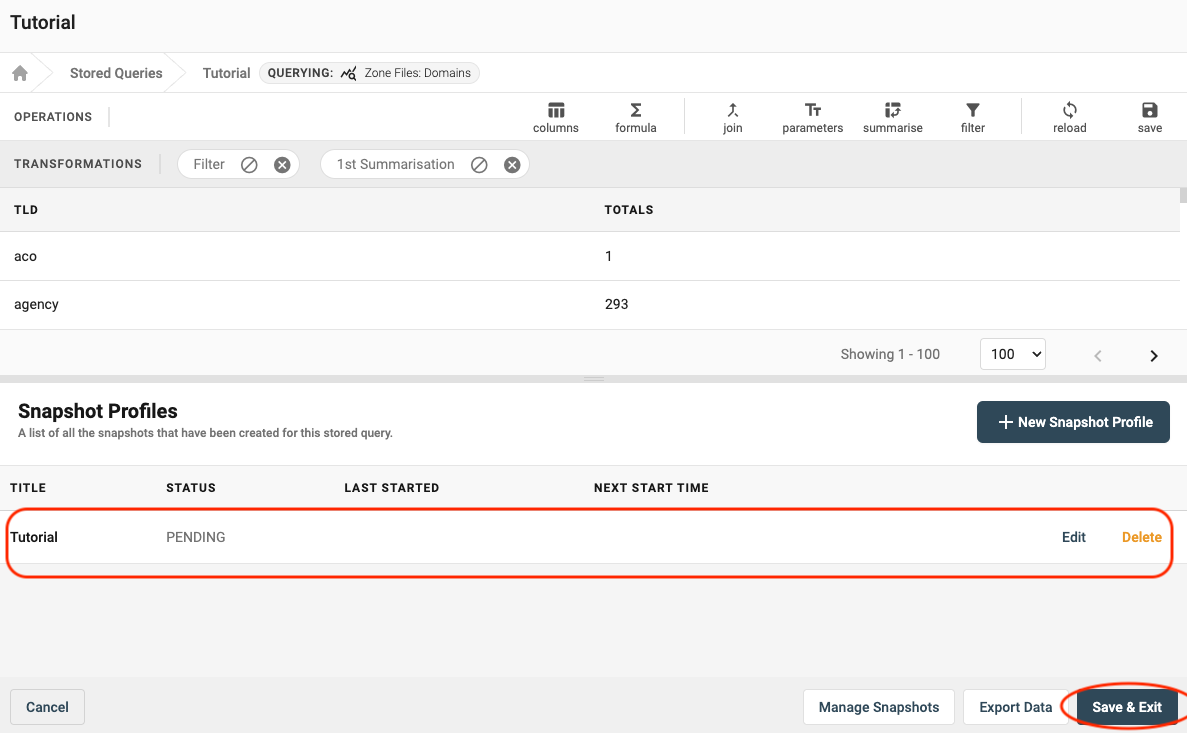
After adding a Snapshot Profile, your Snapshot should appear below. If you chose to schedule your snapshot then the last start time and next start time should be displayed next to it. Then click the 'Save & Exit' button in the bottom right-hand corner.
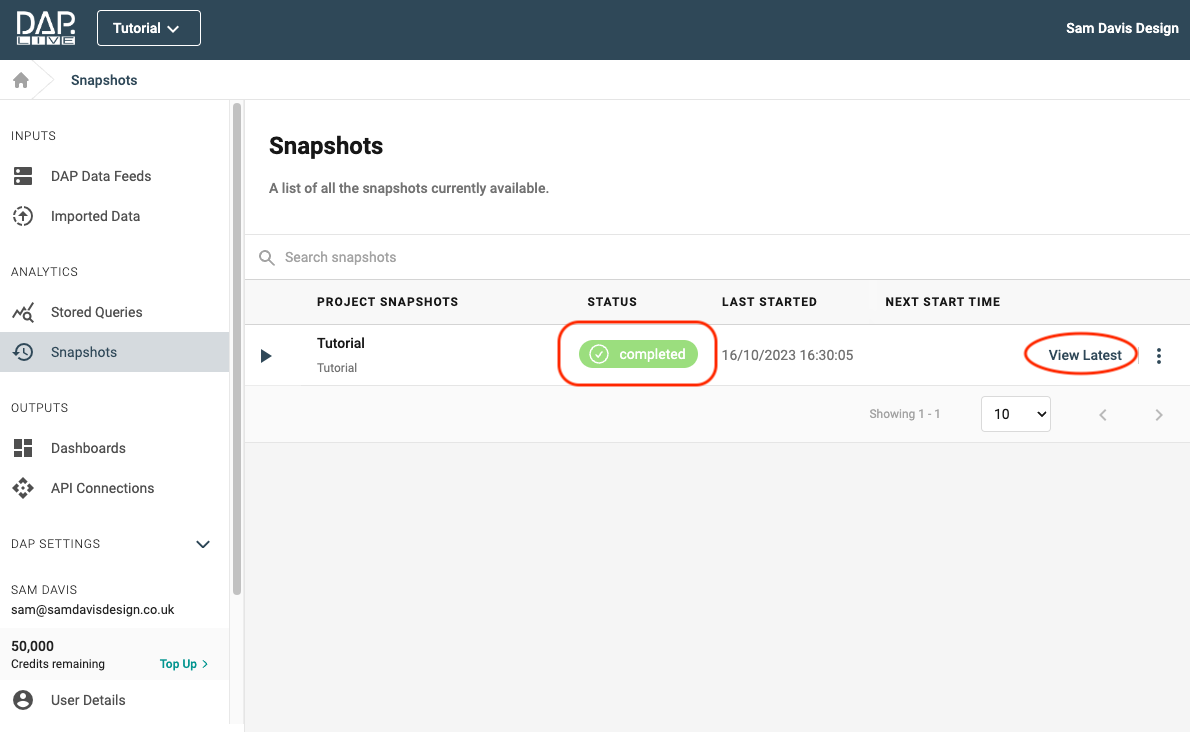
Now if you select the 'Snapshots' section on the panel on the left-hand side of the page (1), you should be able to see all of the Snapshots that you have created. Then you can click the play button next to your Snapshot (2) in order to run it.
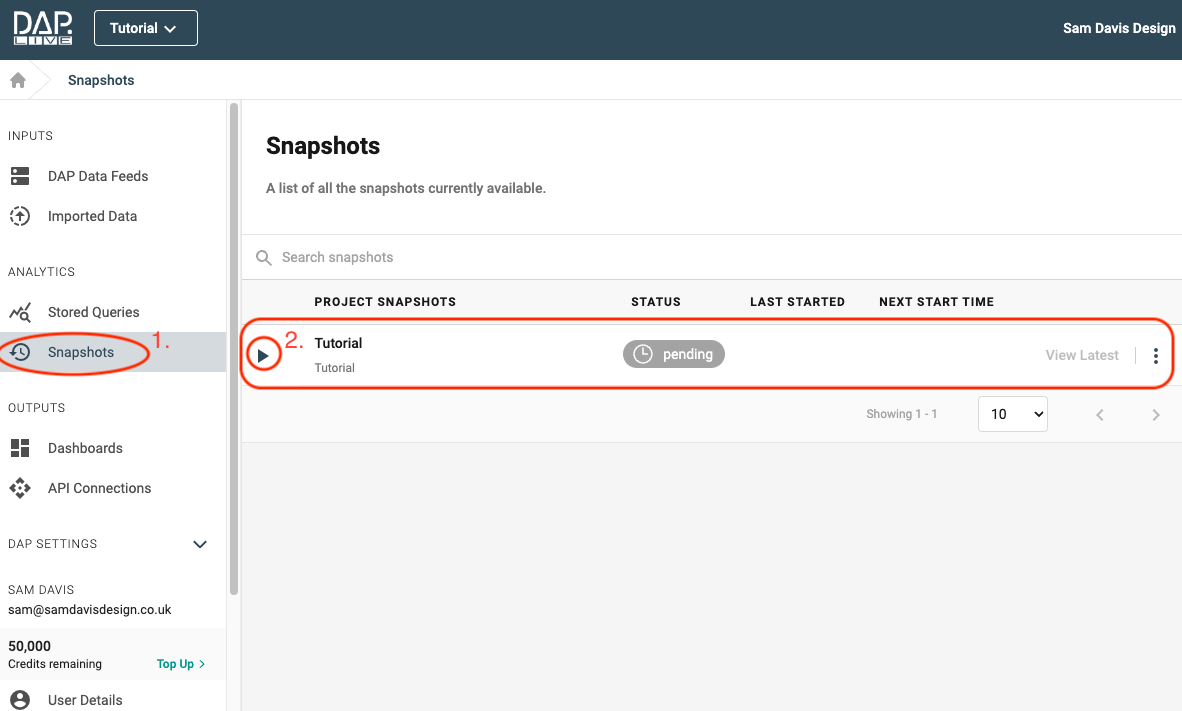
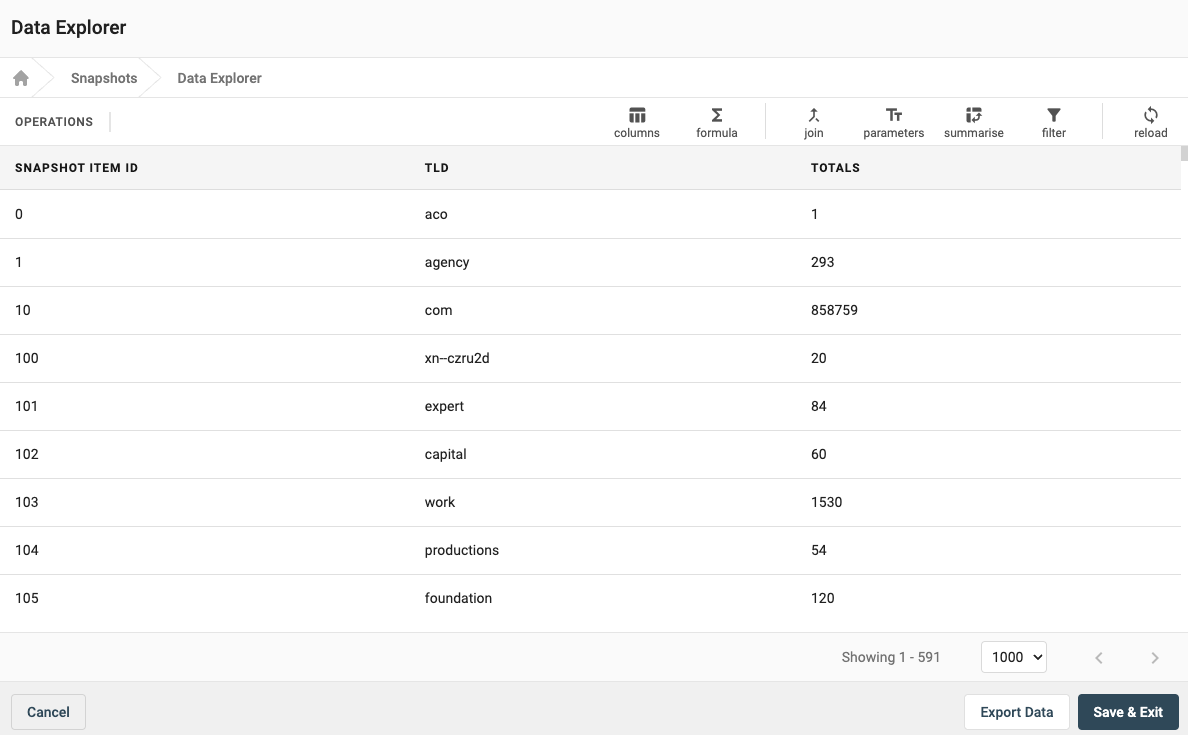
Once your snapshot has been completed, you can click on 'View Latest' to see what your queried data looked like at that point in time.
Your snapshot will now have much faster loading times than your live query.
Time Lapsed Fields
If you want to be able to see how the data changes over time, you can add a time lapse field to your Snapshot. Start by setting the 'Snapshot Type' to 'Historical'