The advanced setting allow you to see the ID column that is currently used as a primary key for your datasource. They also allow you to change the primary key, make your own composite keys and index your datasource to make accessing data faster.
Selecting A Datasource
Firstly, you will need to navigate to the 'My Data' section of the DAP.LIVE. You can do this by selecting 'My Data' from the on the left-hand side bar. All of your pre-existing datasources will be displayed under the 'Imported Data' title. Click the 'Edit' button next to the datasource that you want to use the advanced settings on.

The Advanced Settings Icon
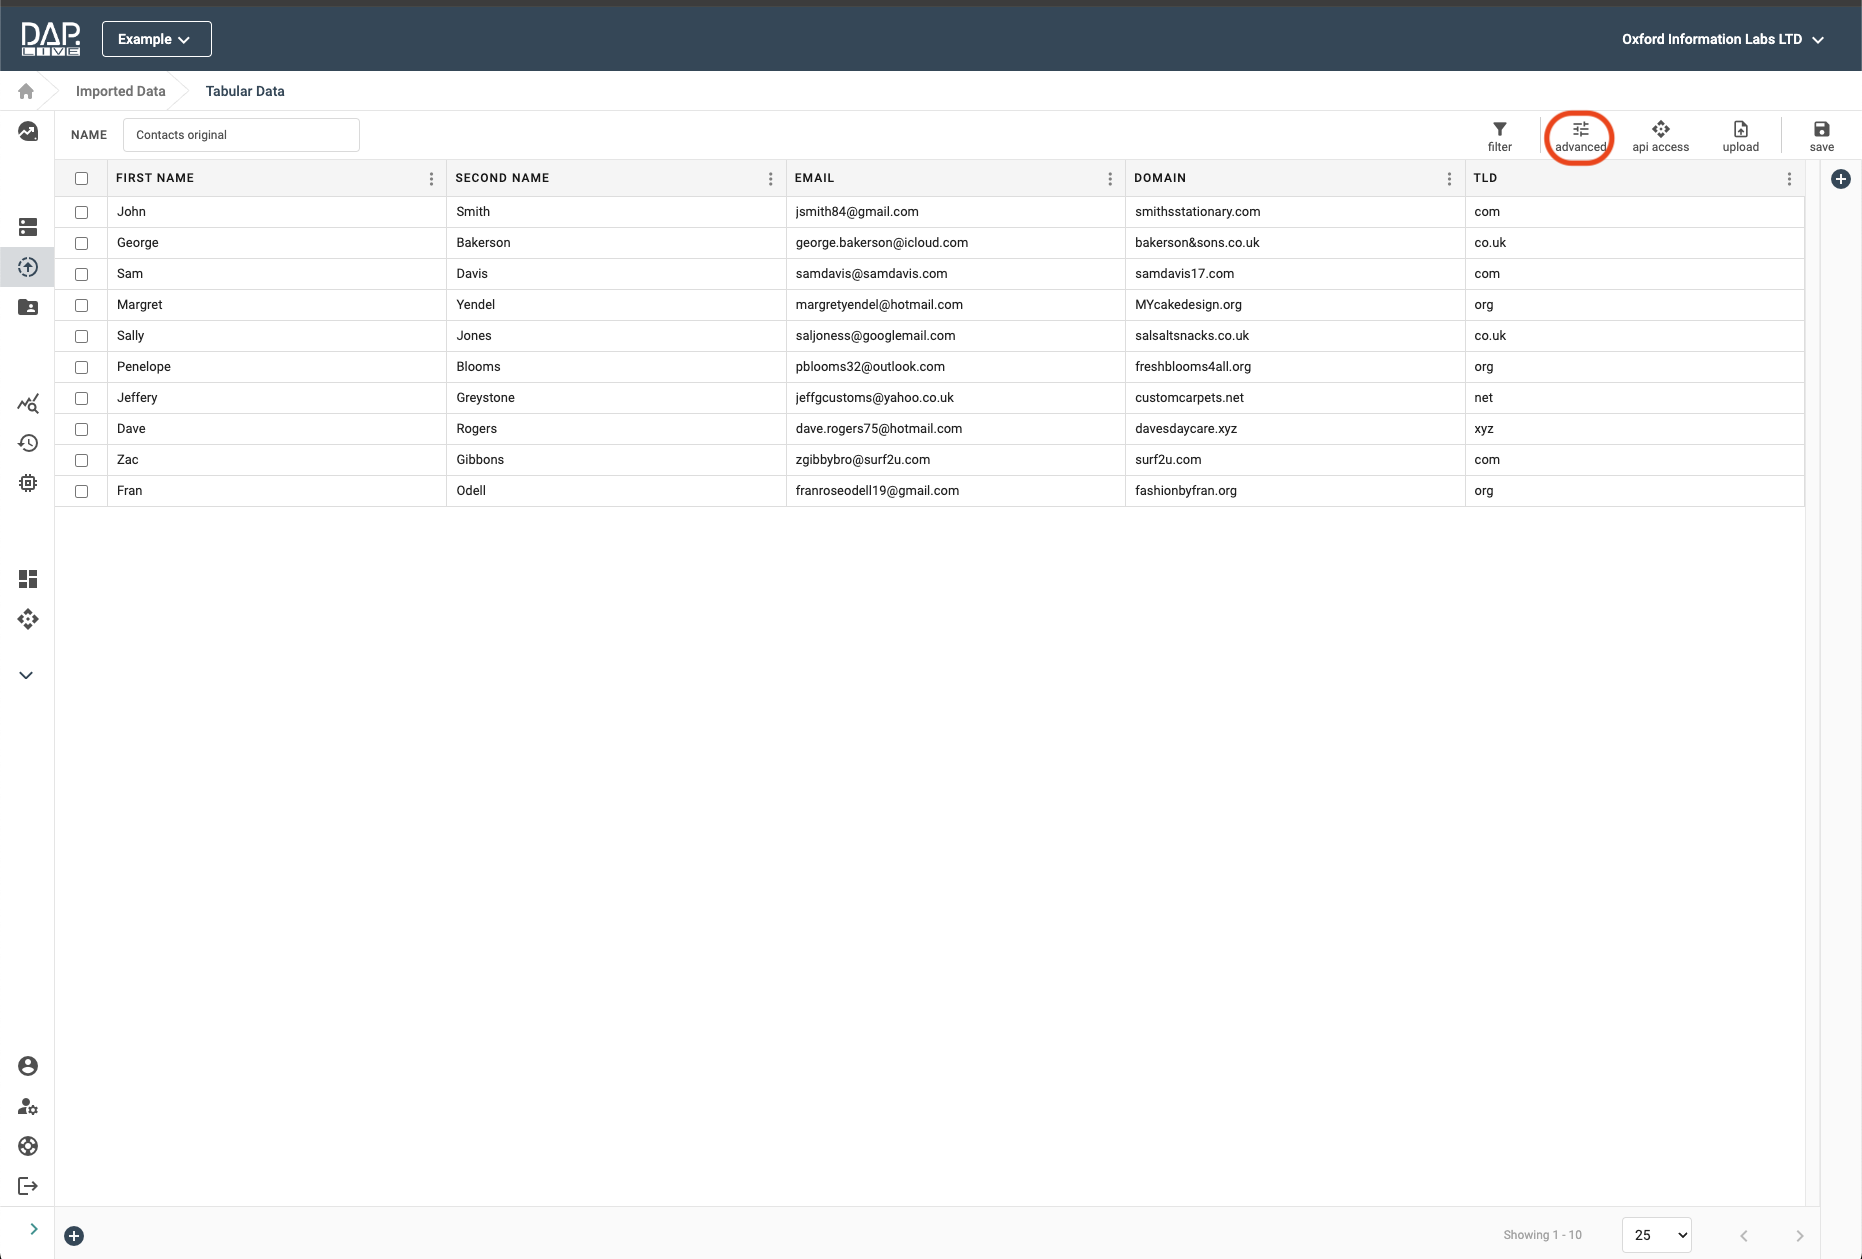
Now that you have opened up your datasource, you need to select the 'Advanced' icon in the top right-hand corner.
ID Column Visibility
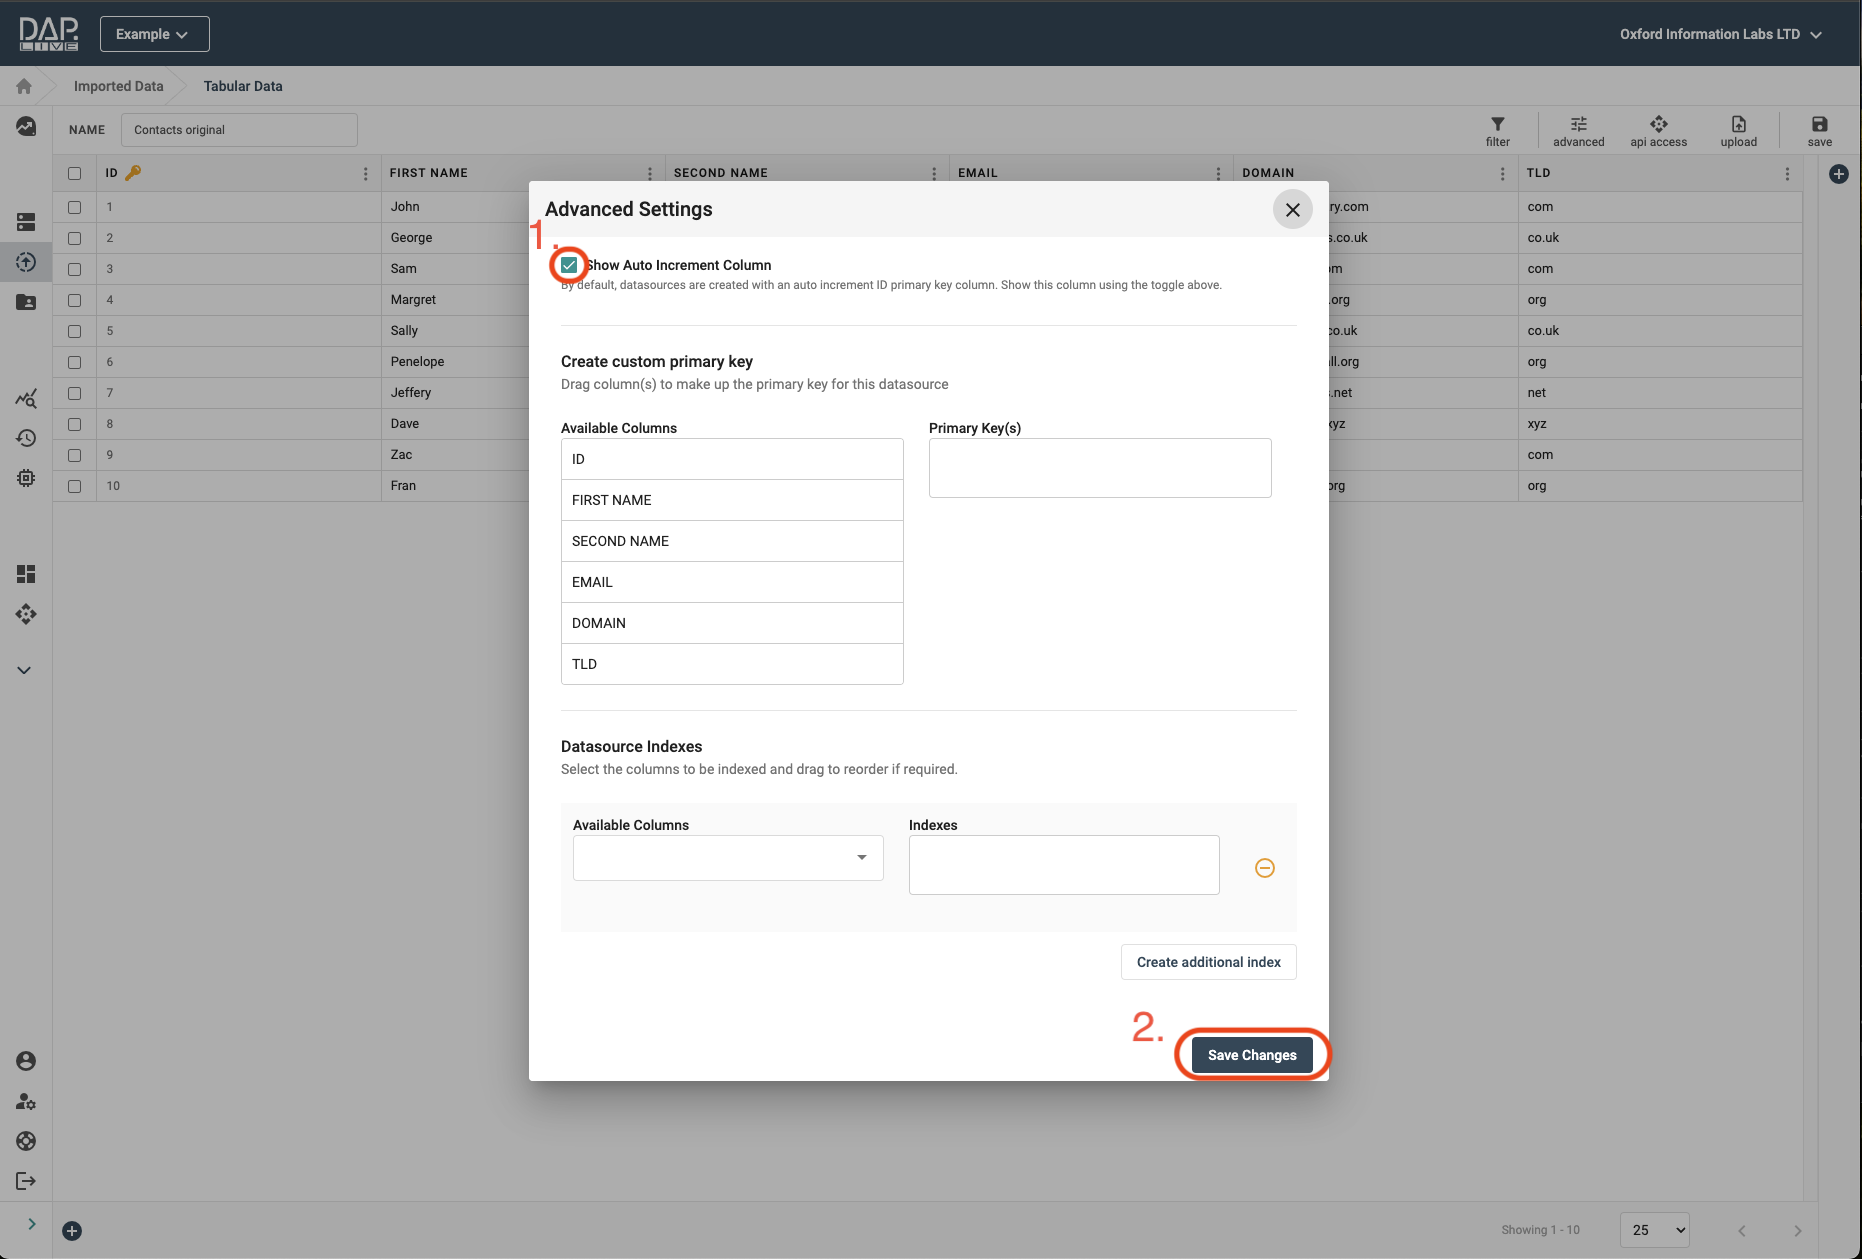
By clicking on the 'Show Auto Increment Column' tick box in the advanced settings, this will display the ID column on the far-left side of the datasource. This column is automatically used as a primary key for the datasource, regardless of whether the column is visible or not. The tick box simply allows you to either show or hide this predetermined primary key column.
As you can see, after ticking the 'Show Auto Increment Column' box, our ID column that is being used as a primary key, has now been made visible.

Creating A Custom Primary Key / Composite Key
If you would rather create your own primary key, you can drag the column title(s) that you want to use to uniquely identify each row and drop them under the 'Primary Key(s)' section. Then click the 'Save Changes' button in the bottom right-hand side of the page. The ID column will then be removed and your selected column tile(s) will now be used as the primary key / composite key instead. In this example, we want to use the first name in combination with the email address to create a composite key that will uniquely identify each row in our datasource.
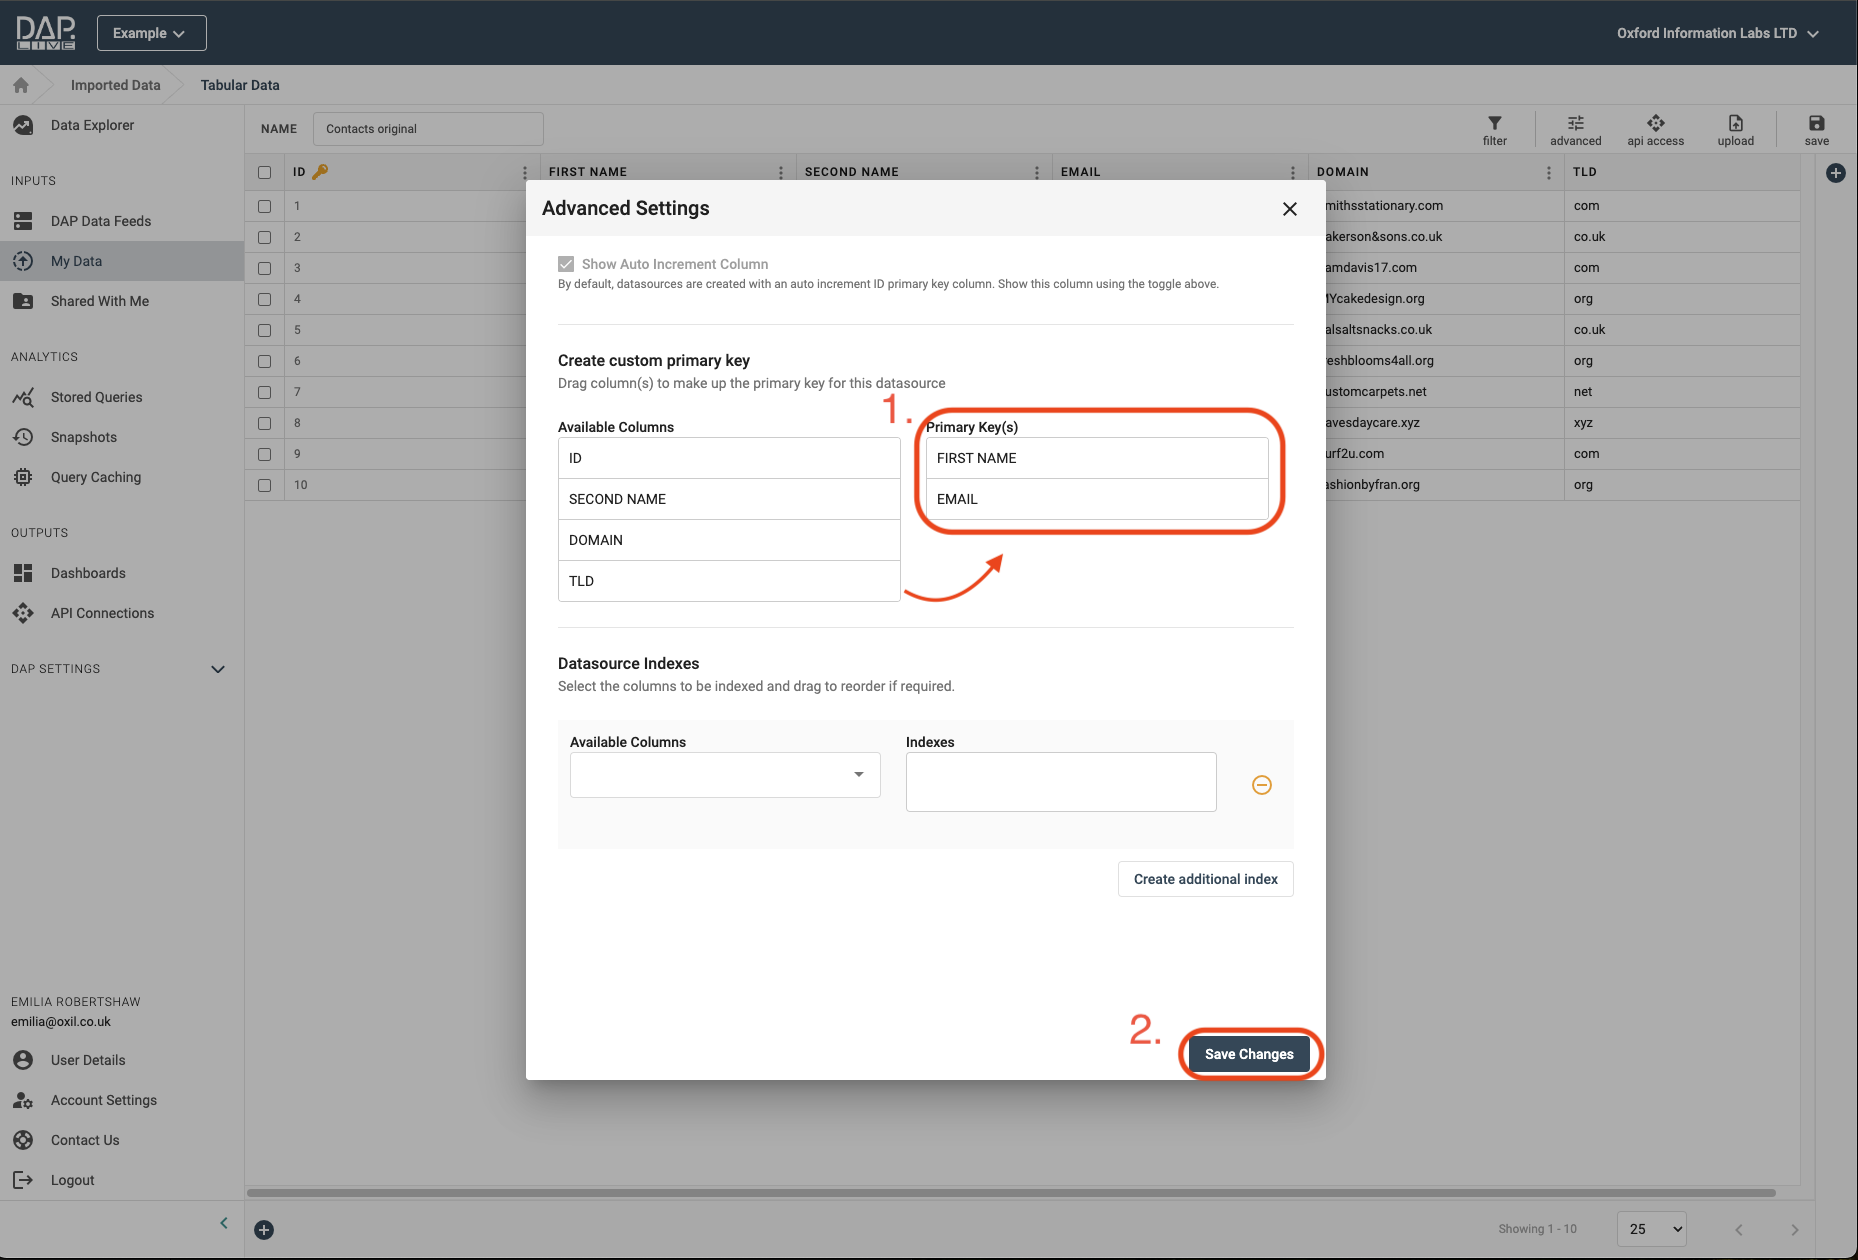
As you can see the columns that have been used to make up our composite key are highlighted in grey and have a key emoji displayed next to their titles.

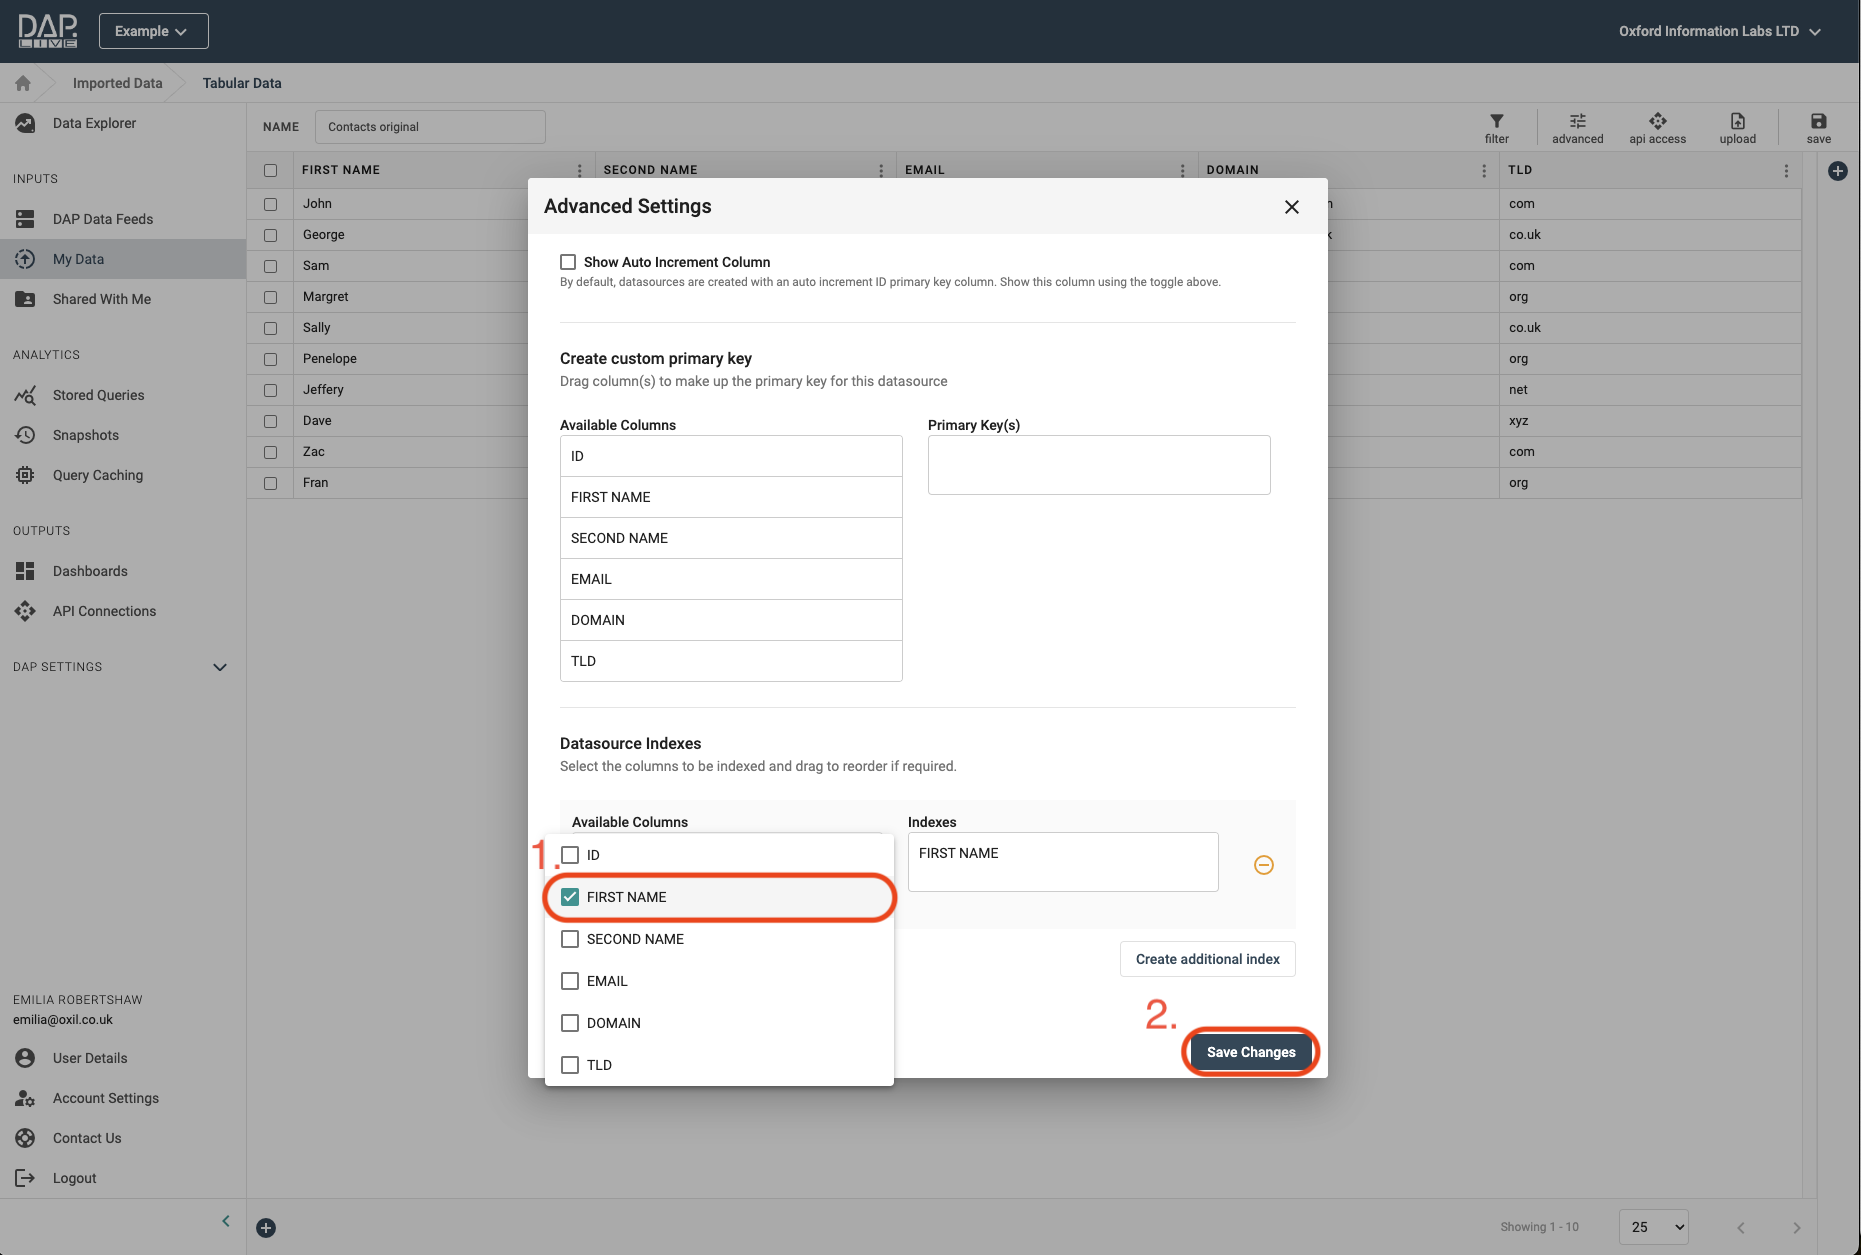
Adding Indexes To Your Datasources
If you have a particularly large datasource then it can be helpful to add indexing to the datasource to make querying it much faster. We are using a very small datasource in this example but if you have a much larger datasource, indexing can make read requests significantly faster. In order to index your datasource, click on the 'Available Columns' dropdown and then tick the tick box(es) next to the column(s) that you want to index to increase access speed. Then click the 'Save Changes' button in the bottom right-hand side of the page.