The filter tool makes it really quick and easy to find certain data entries if you have a lot of data entries in your datasource and you want to edit a specific row or delete specific rows.
Selecting A Datasource
Firstly, you will need to navigate to the 'My Data' section of the DAP.LIVE. You can do this by selecting 'My Data' from the on the left-hand side bar. All of your pre-existing datasources will be displayed under the 'Imported Data' title. Click the 'Edit' button next to the datasource that you want to use the filter tool on.

The Filter Icon
Now that you have opened up your datasource, you need to select the 'Filter' icon in the top right-hand corner. 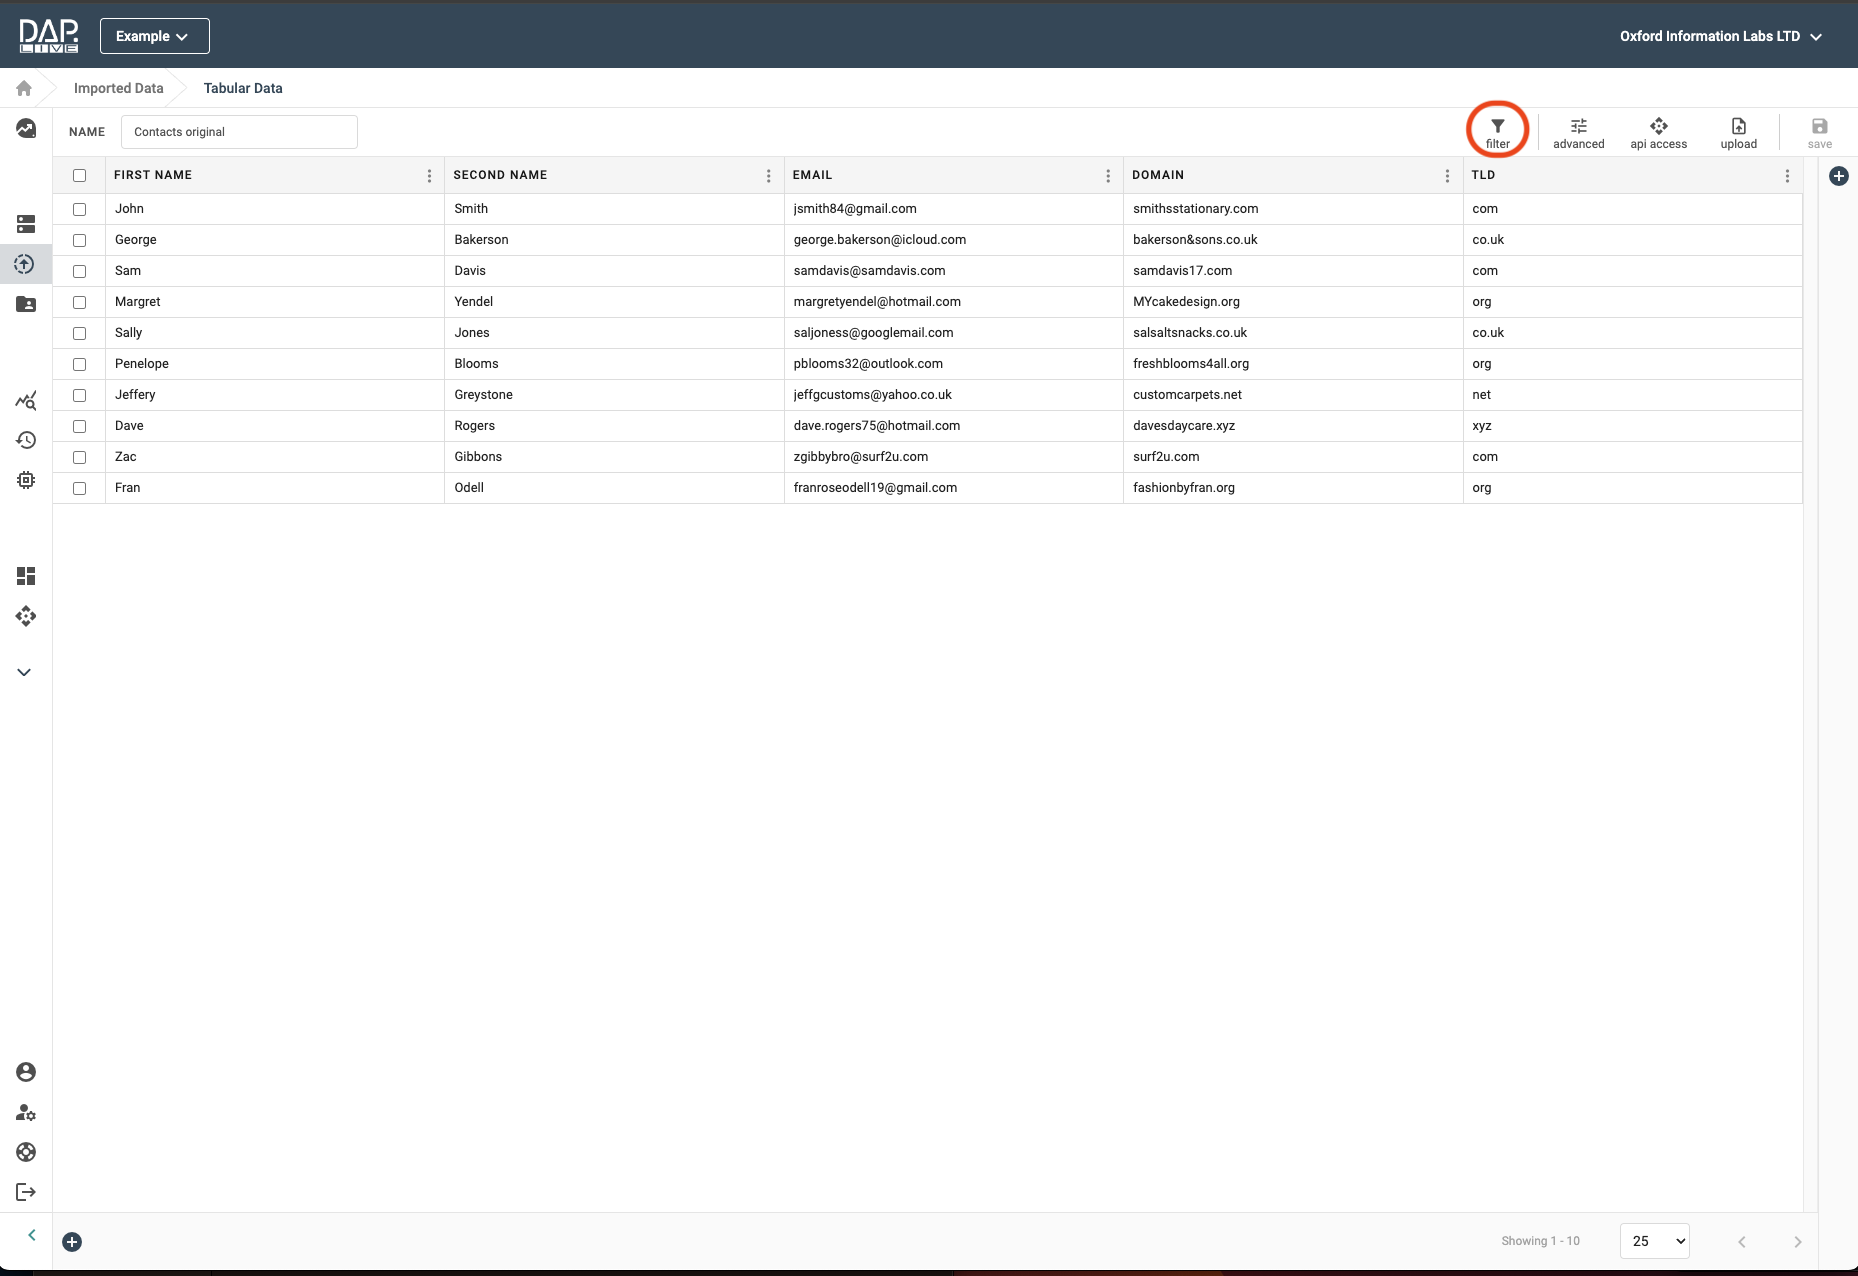
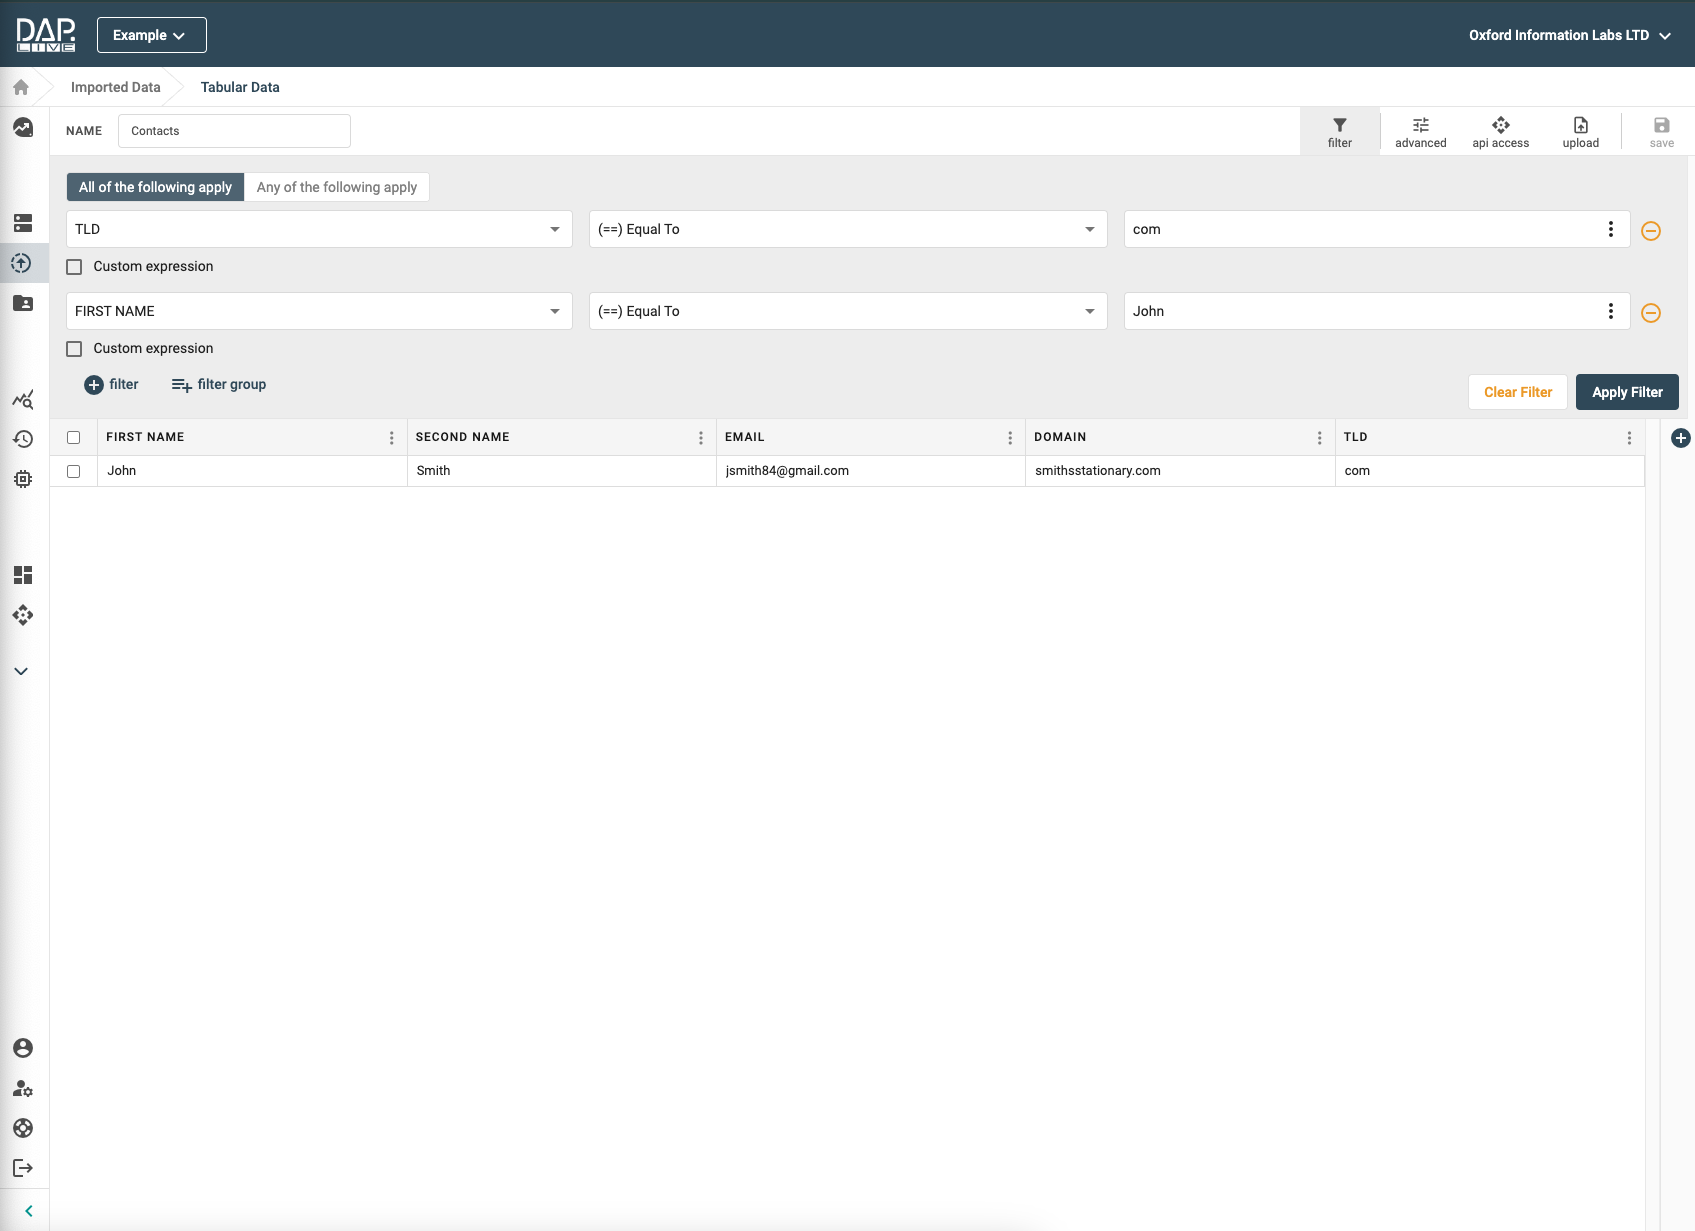
Filter settings will appear and from there you can select the column that you want to search, and the condition and value that you want to filter by. Then click the 'Apply Filter' button in the bottom right-hand side of the filter settings bar. In this example, we are filtering our datasource to find data entries with a TLD of .com. 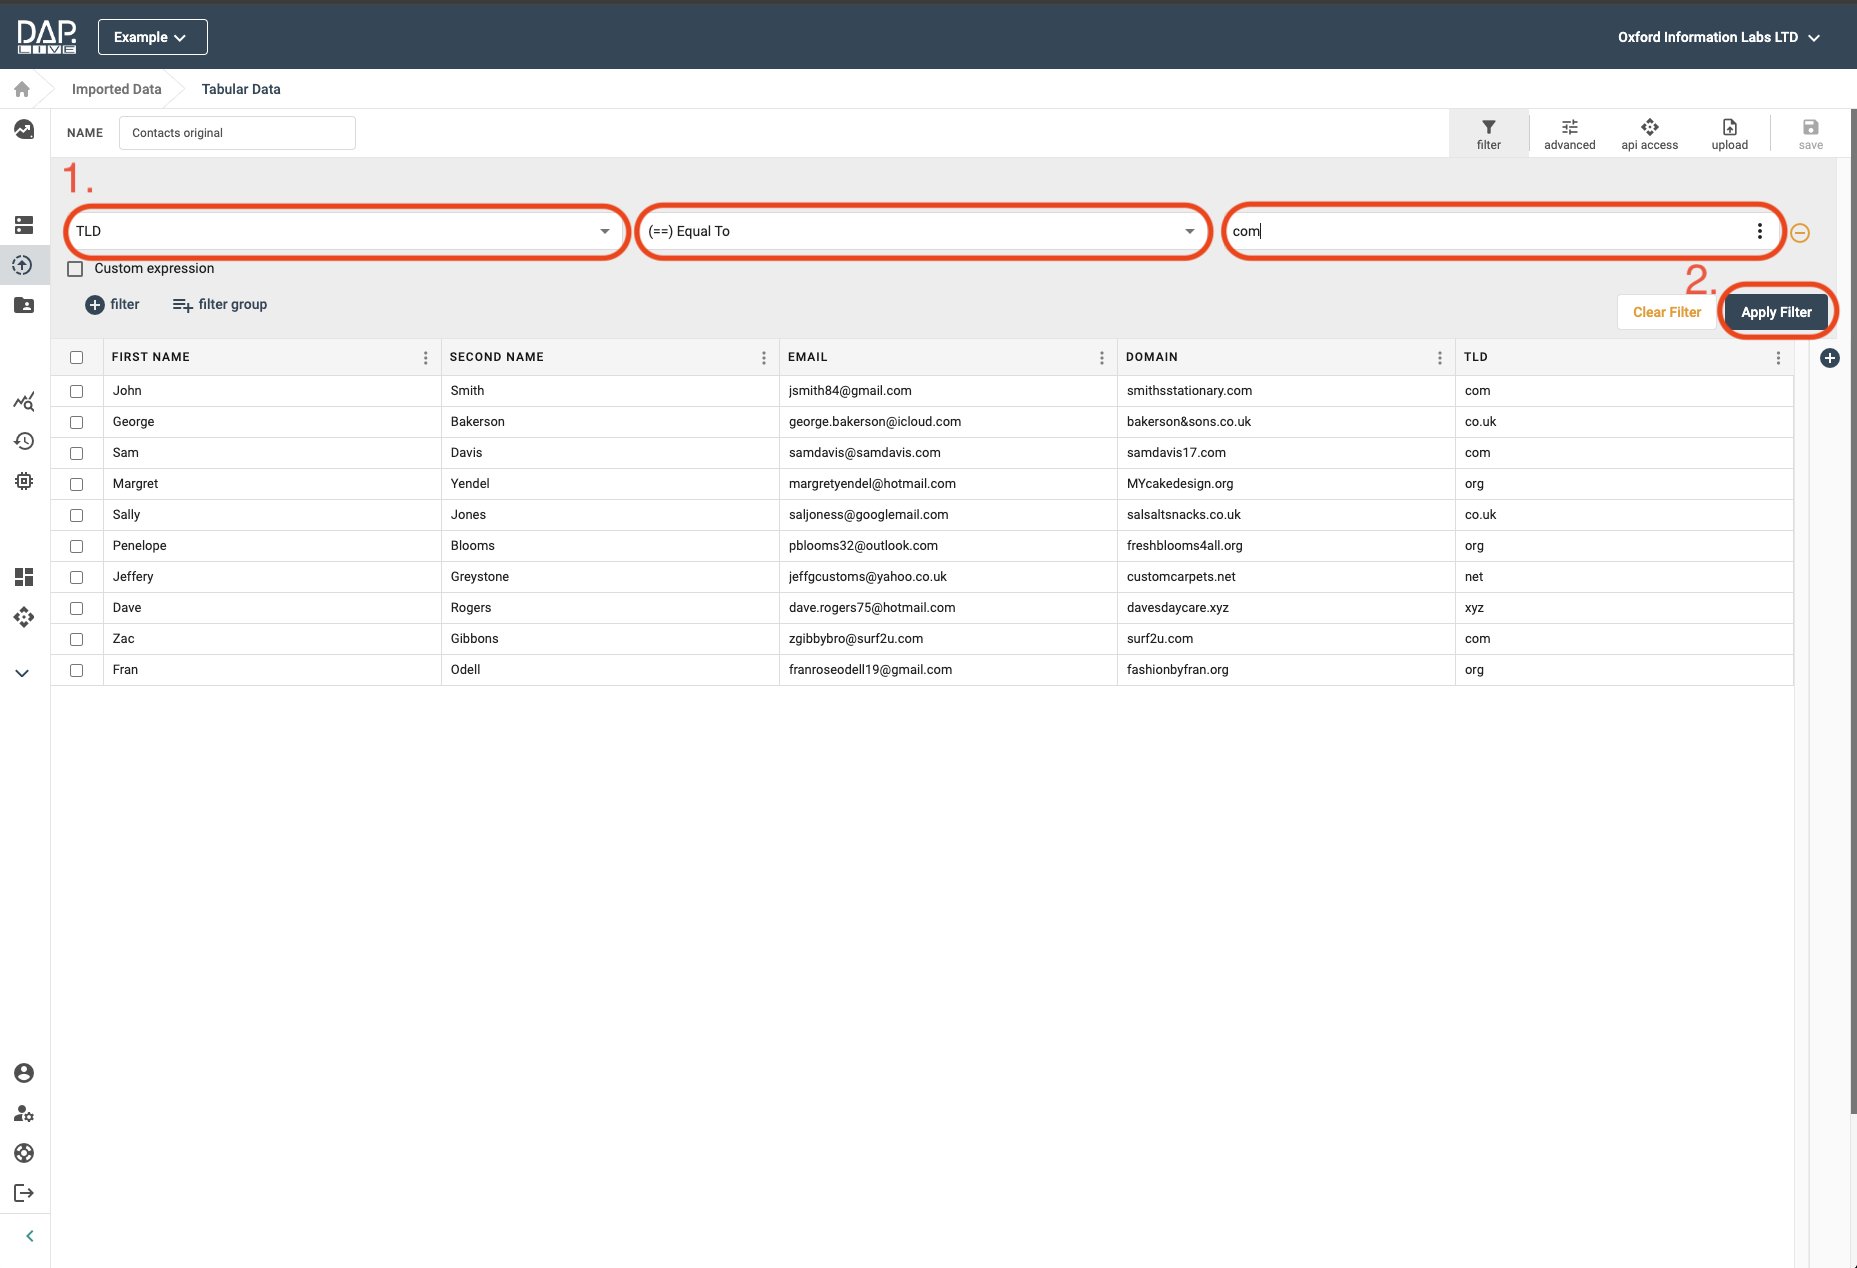
Adding Multiple Filters
As you can see, it has now filtered our datasource to show only the data entries that have a TLD of .com. We can add another filter in order to further filter down the number of data entries. Click on the '+ filter' button at the bottom left-hand side of the filter settings bar.

Now you can add a second filter, again selecting the column that you want to search, and the condition and value that you want to filter by. If you select the 'All of the following apply' button in to top left-hand corner, then this applies the filters using a logical AND, meaning that the data entry has to meet the requirements of BOTH the first and the second filter in order for it to be shown.
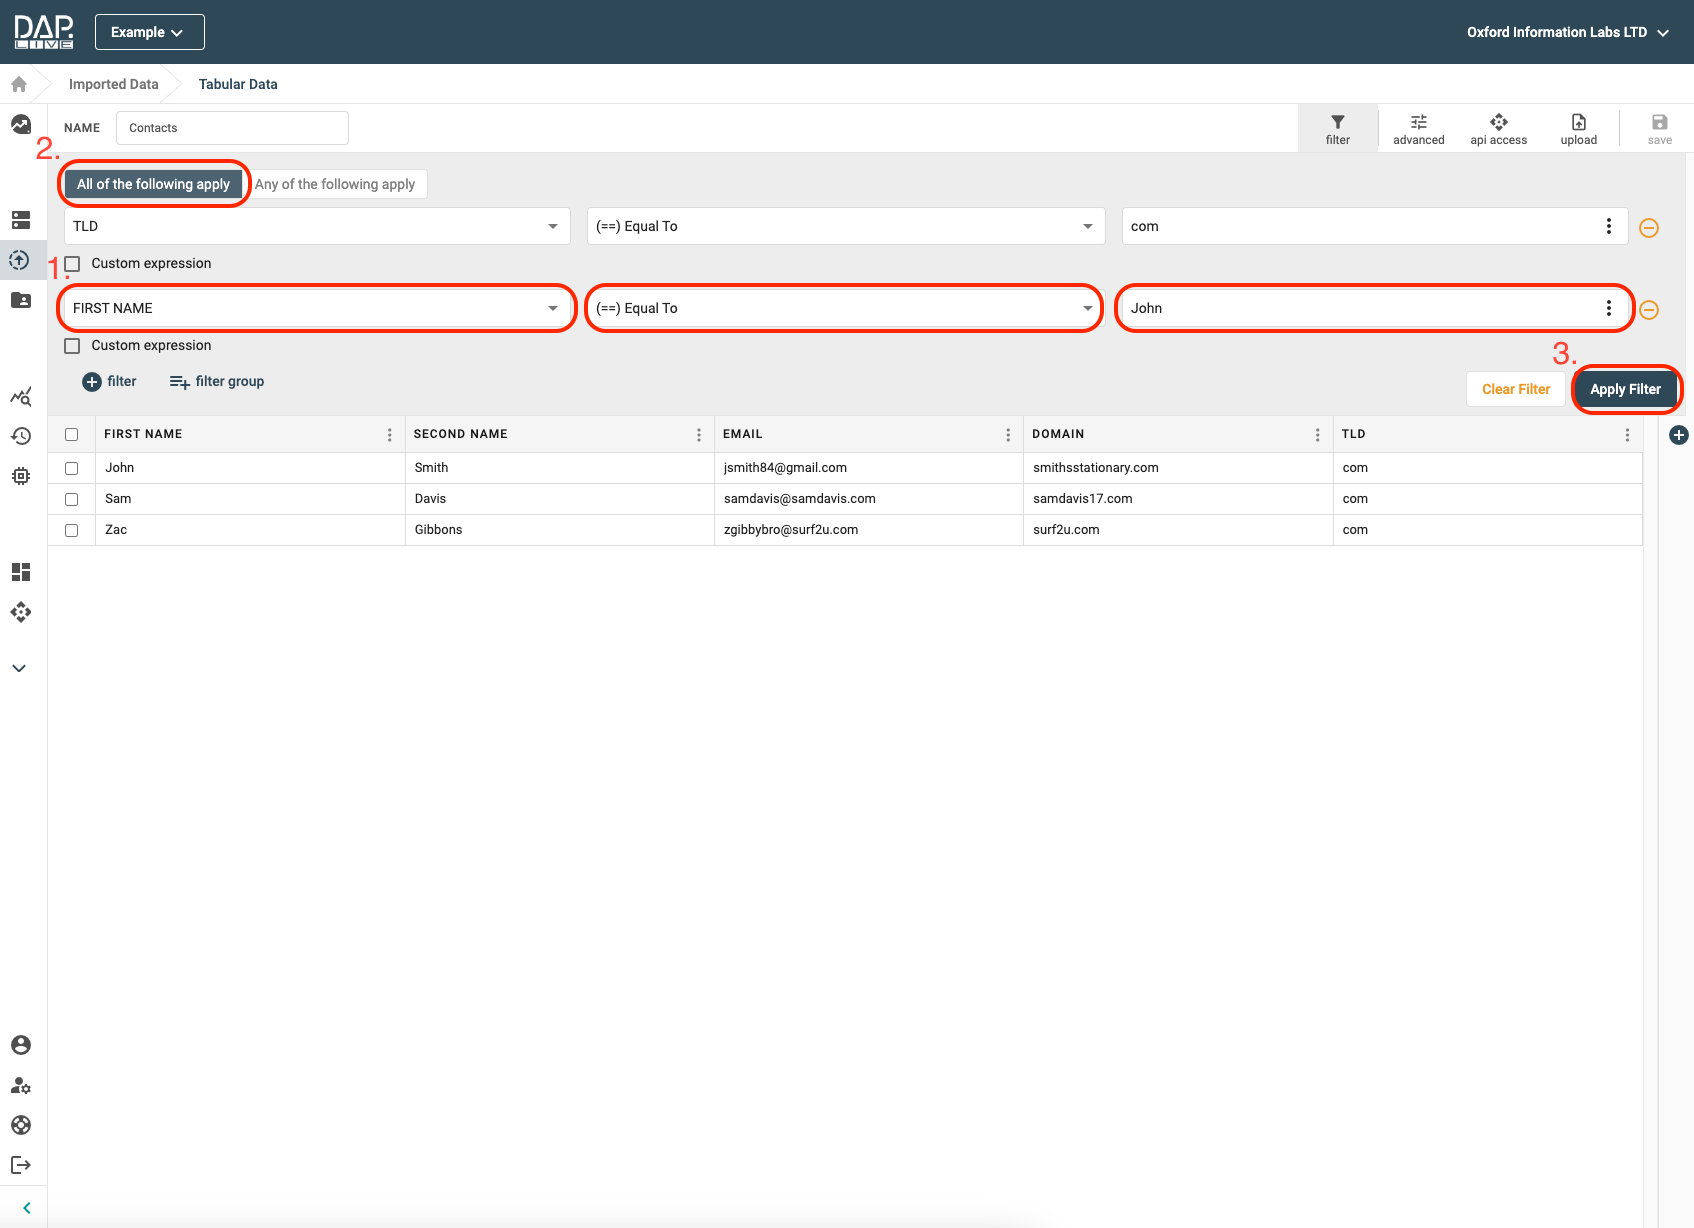
Because we filtered our datasource to only display data entries with a TLD of .com AND a first name of John, only 1 data entry meets both of those requirements and is displayed after the filters have been applied.
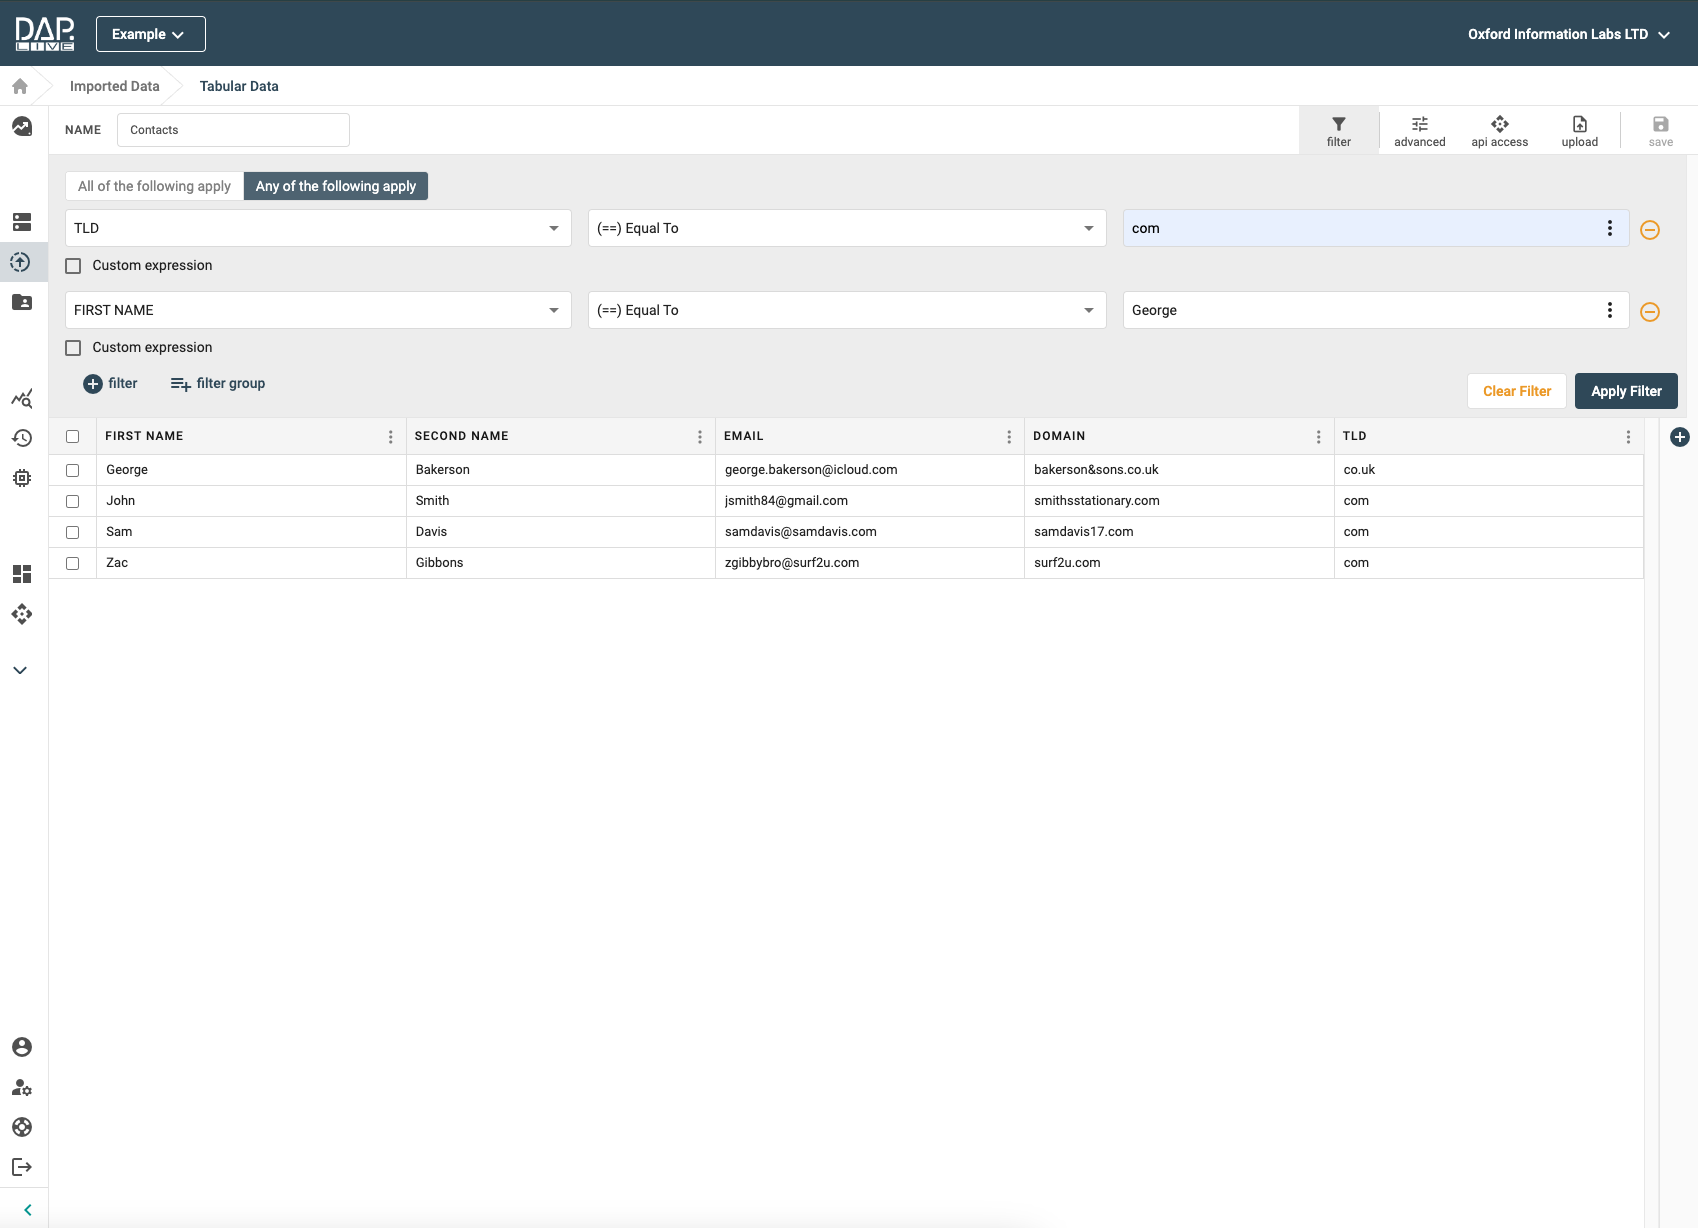
If you select the 'Any of the following apply' button in to top left-hand corner, then this applies the filters using a logical OR, meaning that the data entry only needs to meet the requirements of EITHER the first filter or the second filter for it to be shown. In this example, we are filtering our datasource to find data entries that either have a TLD of .com or that have a first name of George.

As you can see, the data entries shown after the filters were applied either have TLDs of .com, or if they don't, the first name is George.
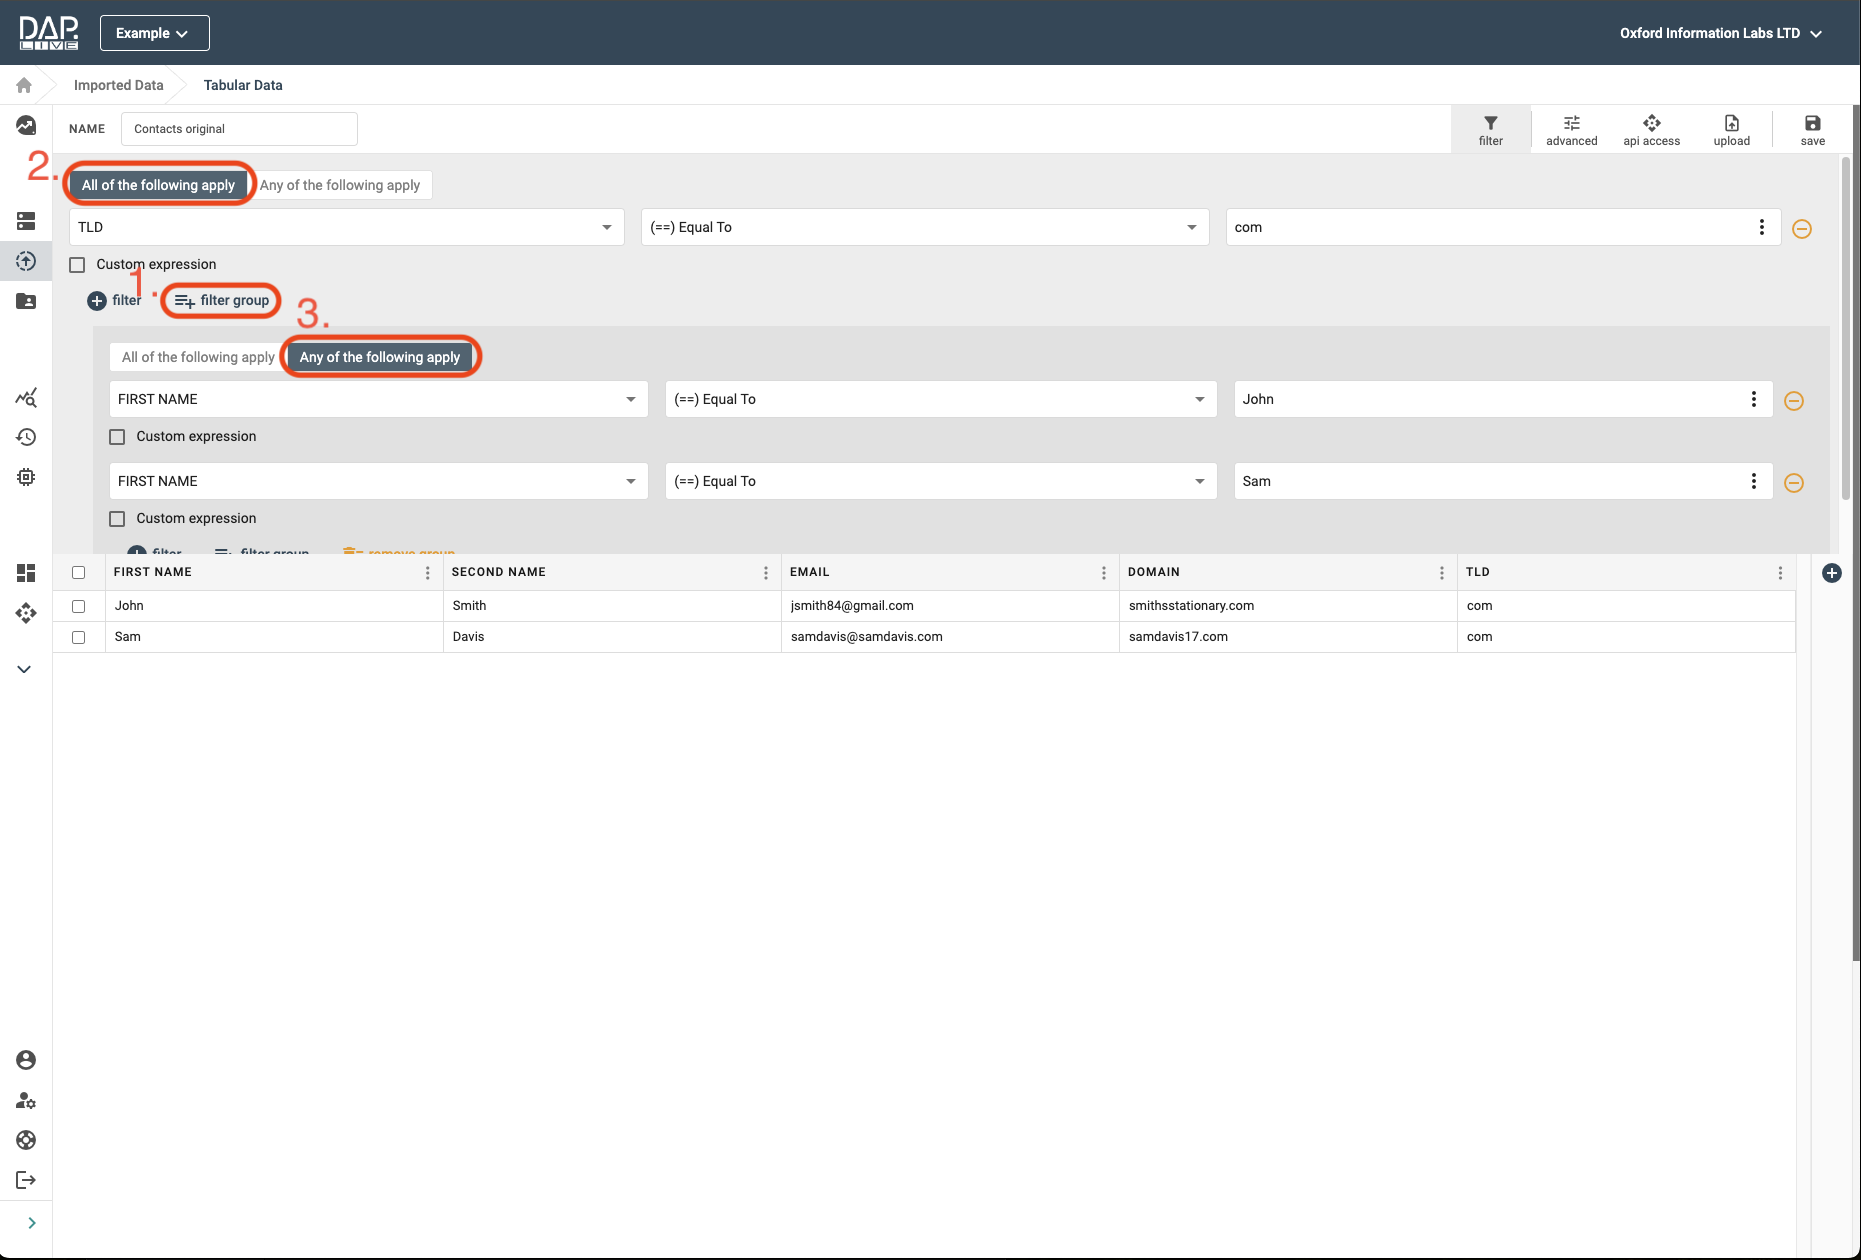
Adding Filter Groups
You can add nested logic into your filters by adding a filter group. For example, we have filtered our datasource so that it will only show data entries with a TLD of .com AND a first name of either John OR Sam.