Since initially uploading your own data into the DAP.LIVE system, you may have acquired some more recent data records which you wish to add into your current datasource. You can always manually add more rows to your datasource but with larger numbers of additions it will be much more efficient to import your new data into the DAP.LIVE using a CSV file upload.
Selecting A Datasource
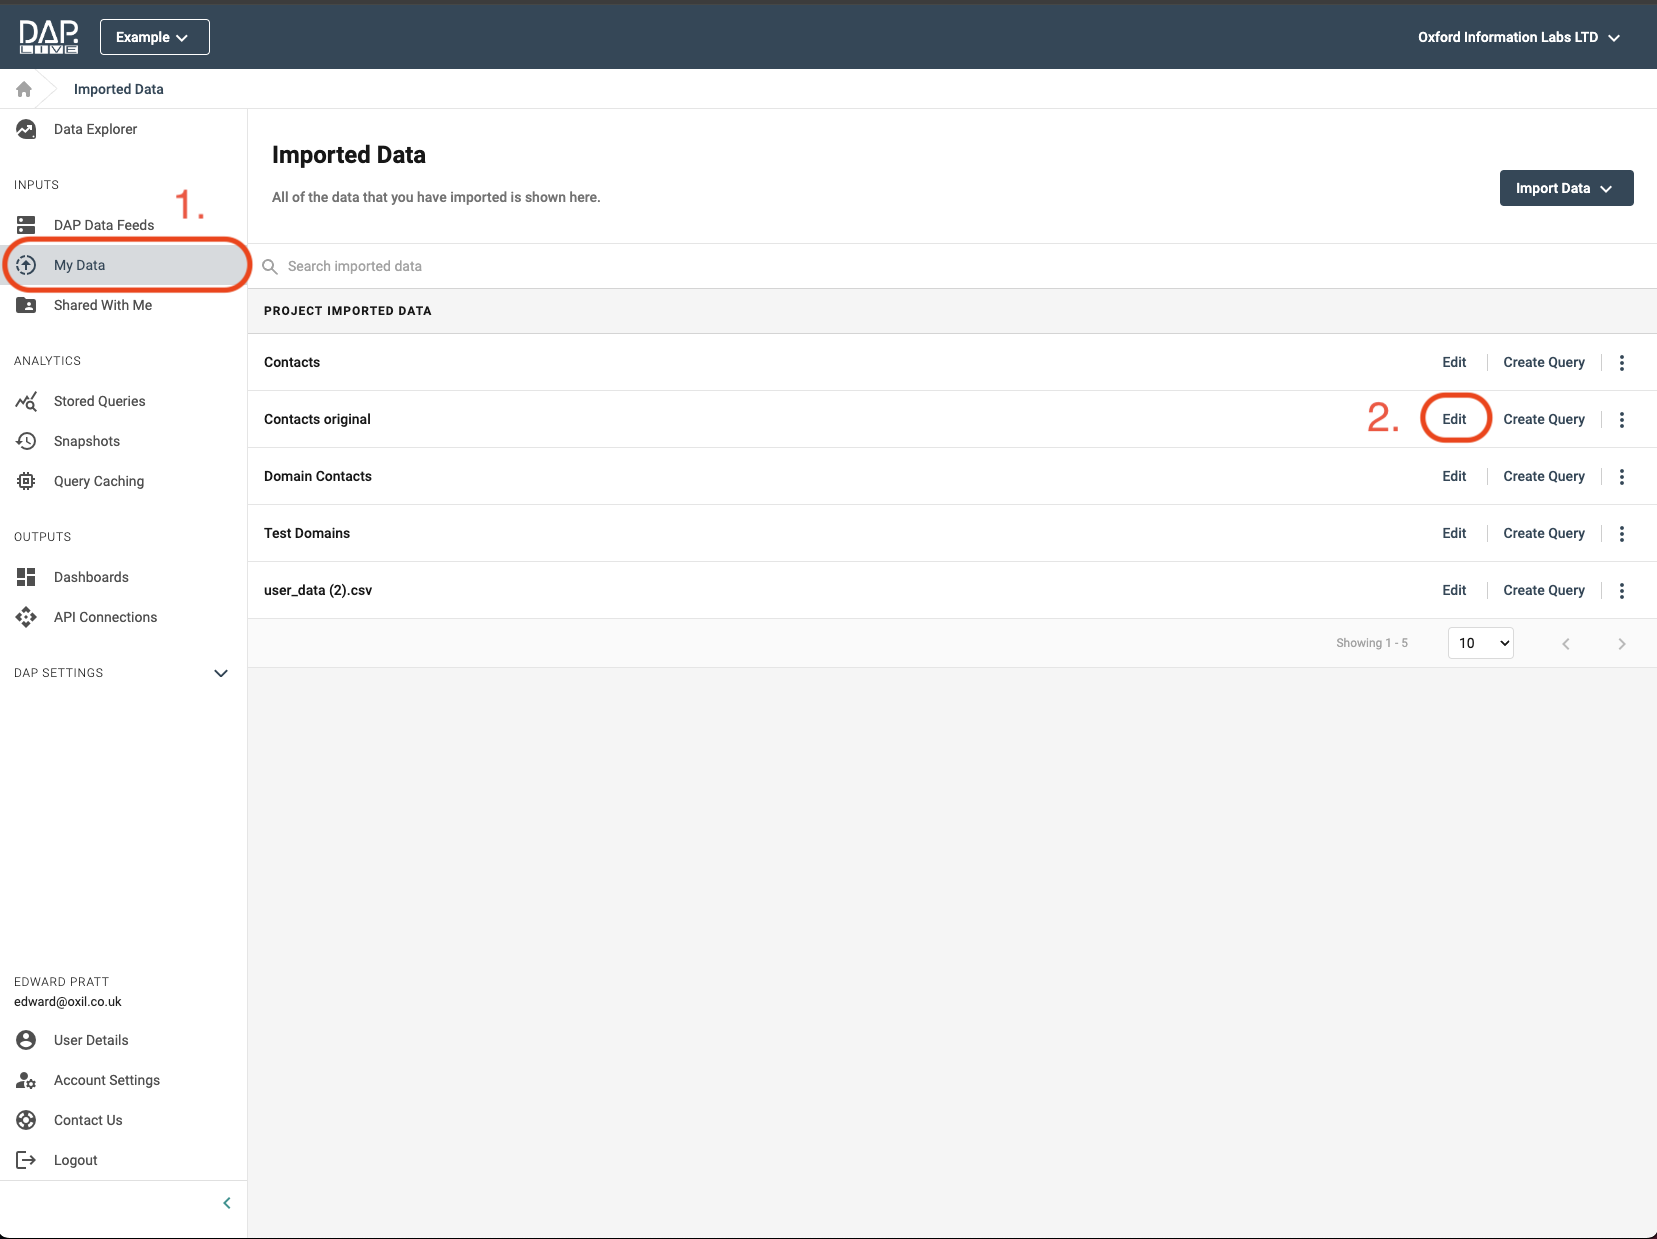
Firstly, you will need to navigate to the 'My Data' section of the DAP.LIVE. You can do this by selecting 'My Data' from the on the left-hand side bar. All of your pre-existing datasources will be displayed under the 'Imported Data' title. Click the 'Edit' button next to the datasource that you wish to add more data to.
The Upload Icon
Now that you have opened up your datasource you need to select the 'Upload' icon in the top right-hand side of the page.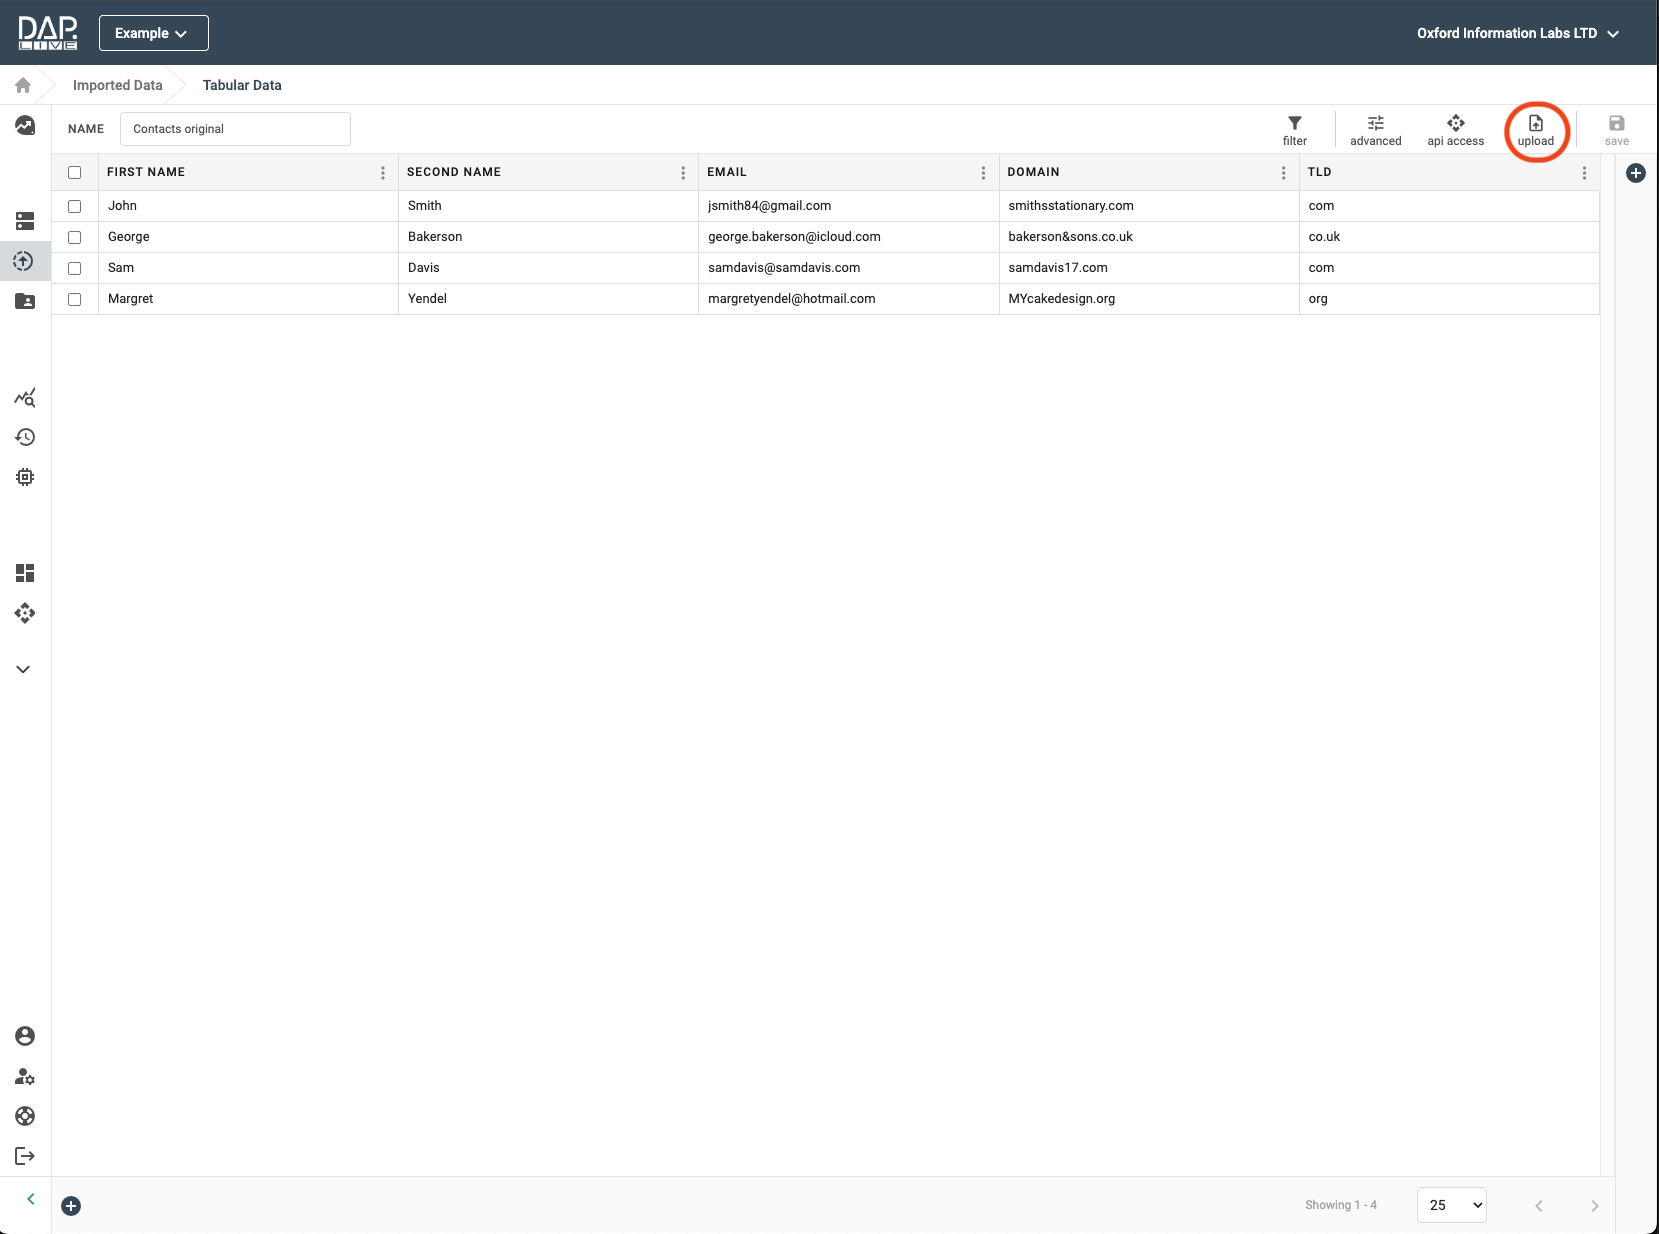
Uploading Your File
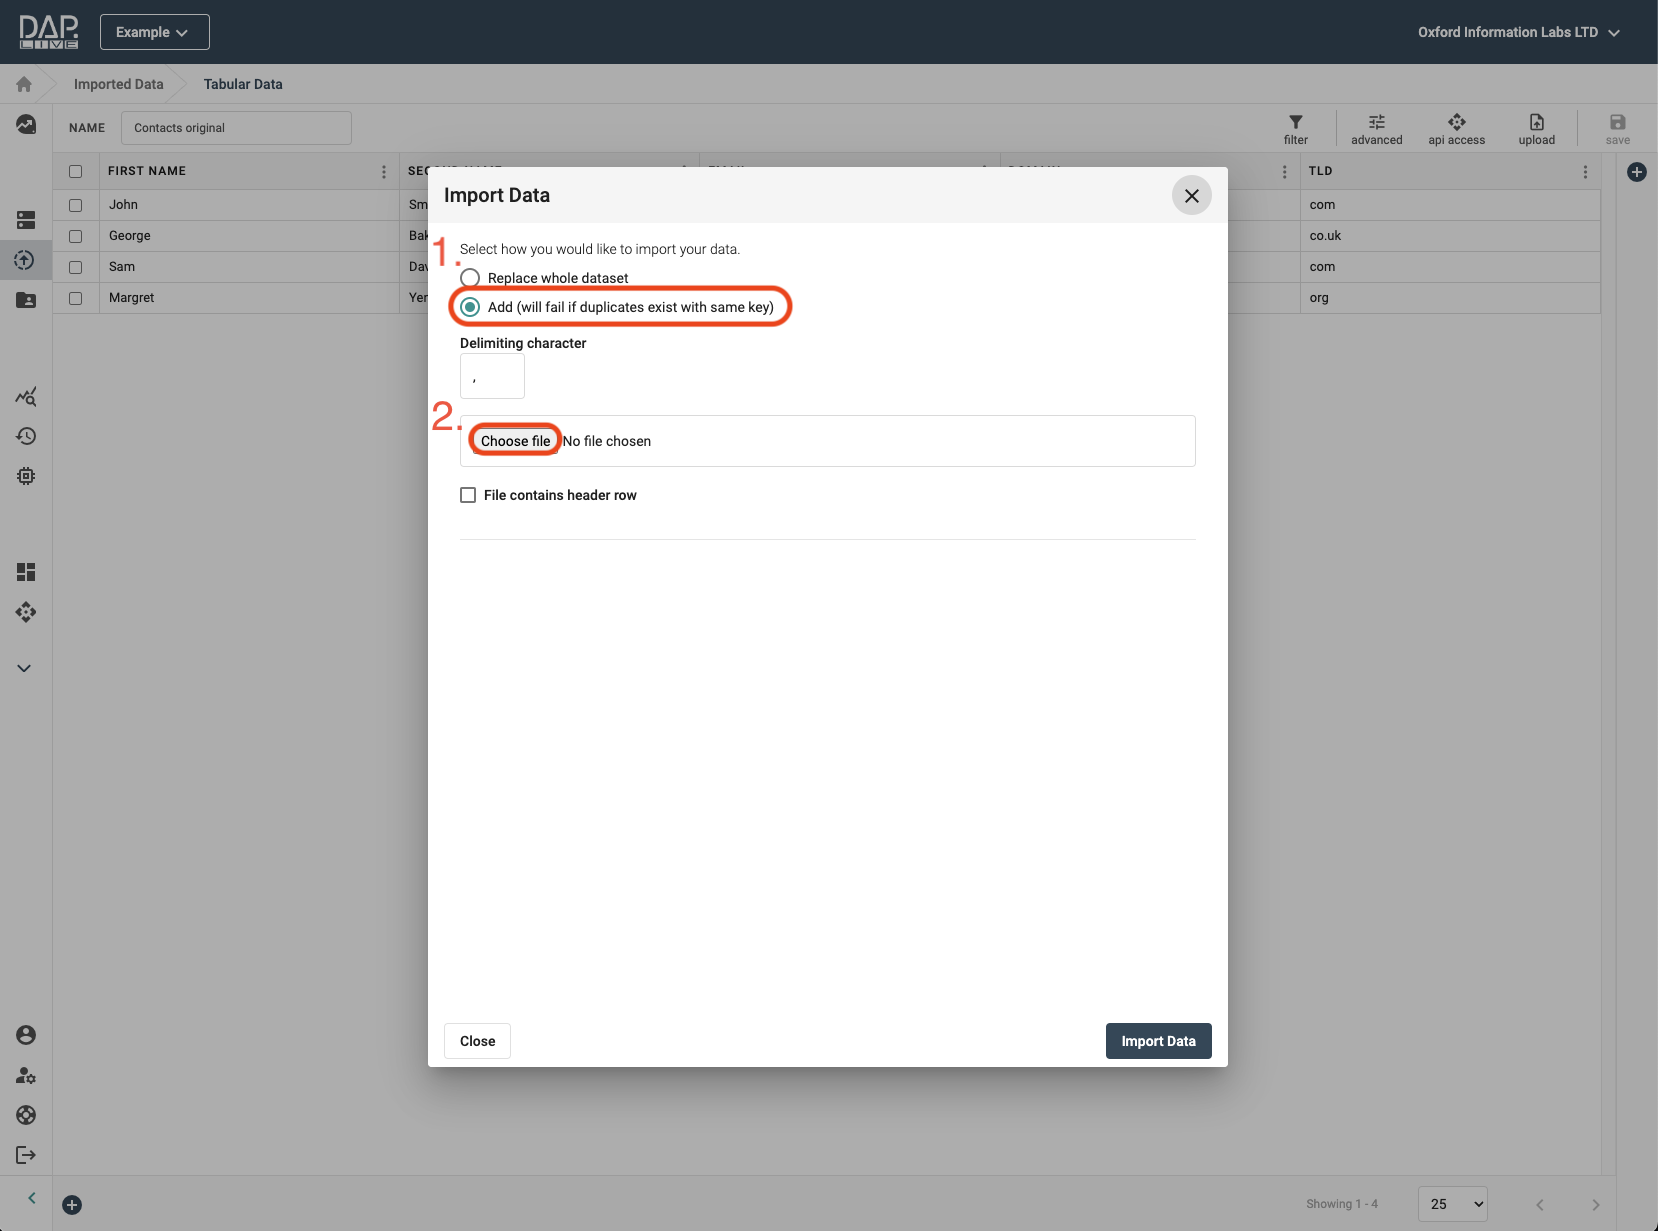
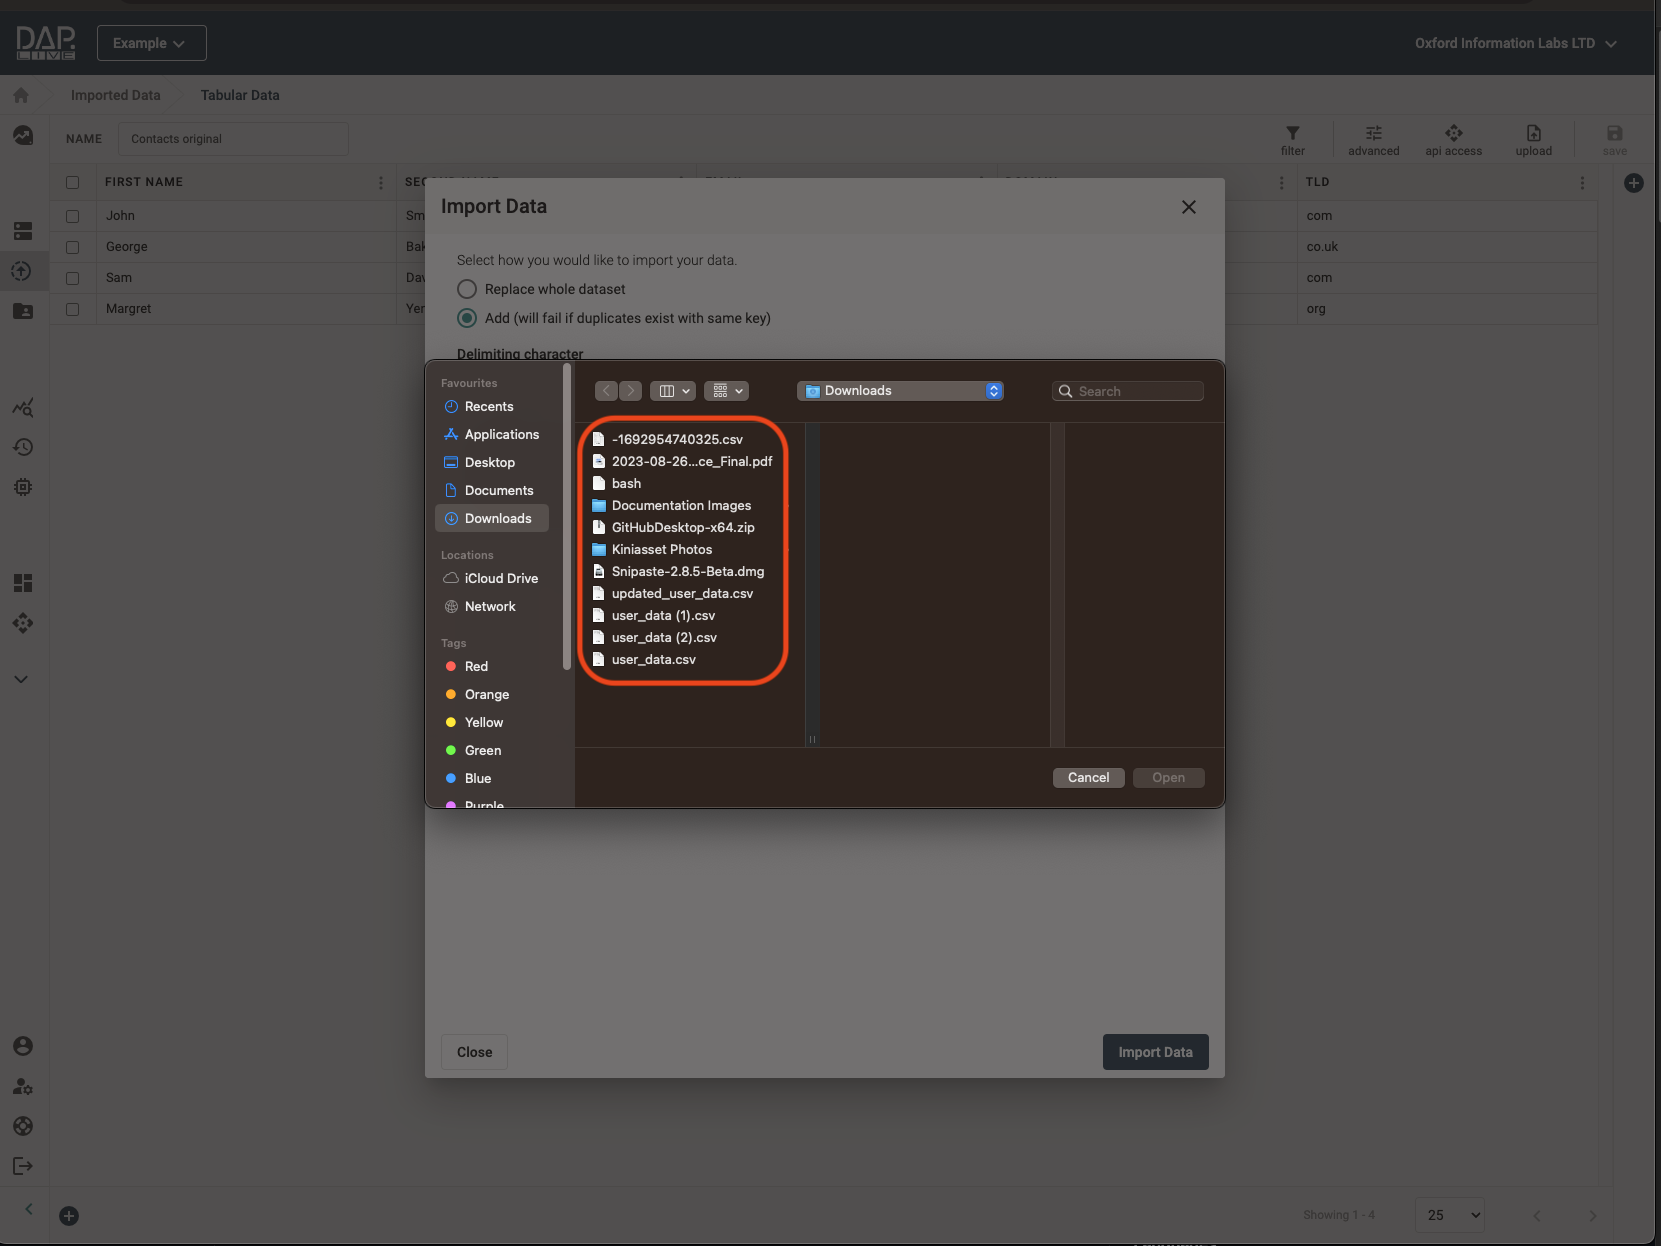
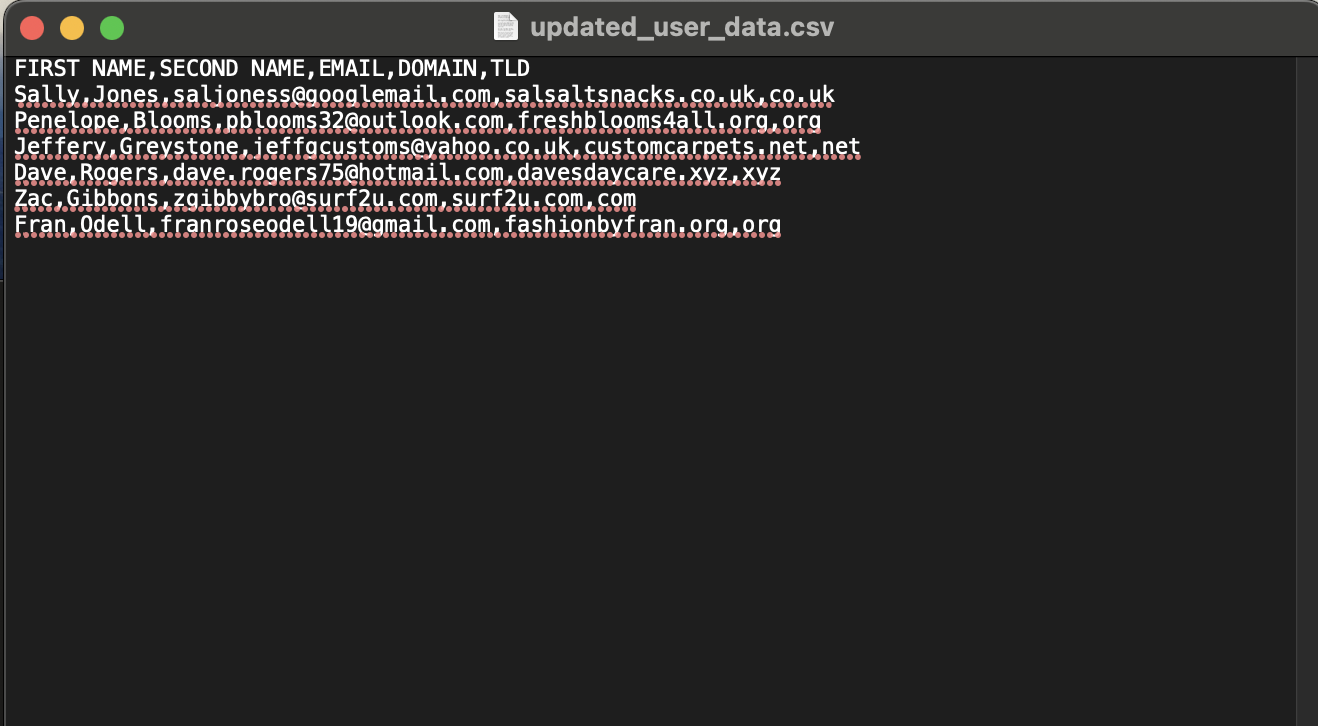
Now you will have to select the 'Add' button which will add your new data to the pre-existing dataset, unless you want to replace the whole of the existing datasource with your new data. Then you can chose your CSV file from your desktop. Because it is a CSV file, the delimiting character will be automatically set to a comma but you can change it if your file uses alternative formatting.
Selecting Your Datasource Column Titles
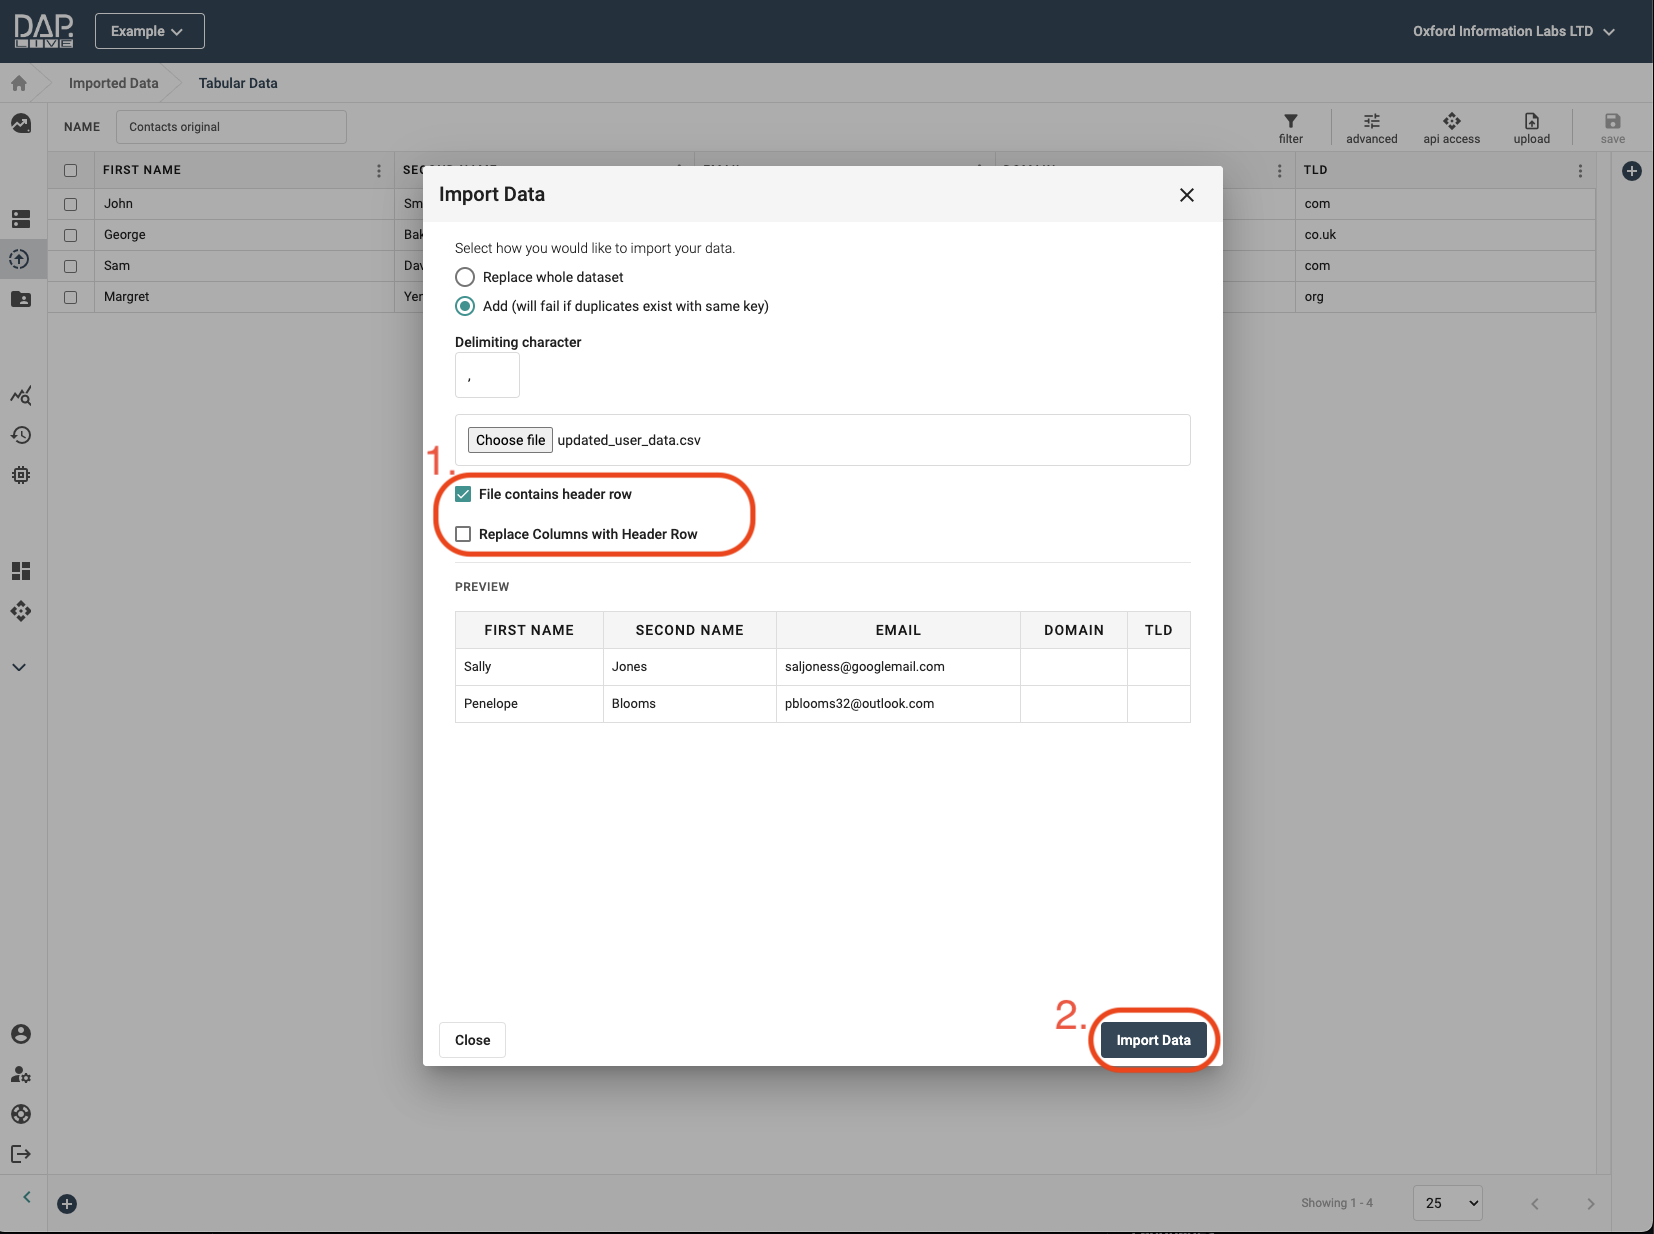
The first tick box confirms whether the top row of your CSV file contains column titles or not. If it does not, then the data will be added to the datasource using the original column titles. If your CSV file does contain column titles, then a second tick box will become available to you. If you tick this box, the original column titles in your datasource will be replaced by the column titles in the top row of the uploaded CSV file, otherwise the top row of the CSV file is removed and the original column titles will be used. Once you are happy with your column titles, click on the 'Import Data' button to save your new datasource.
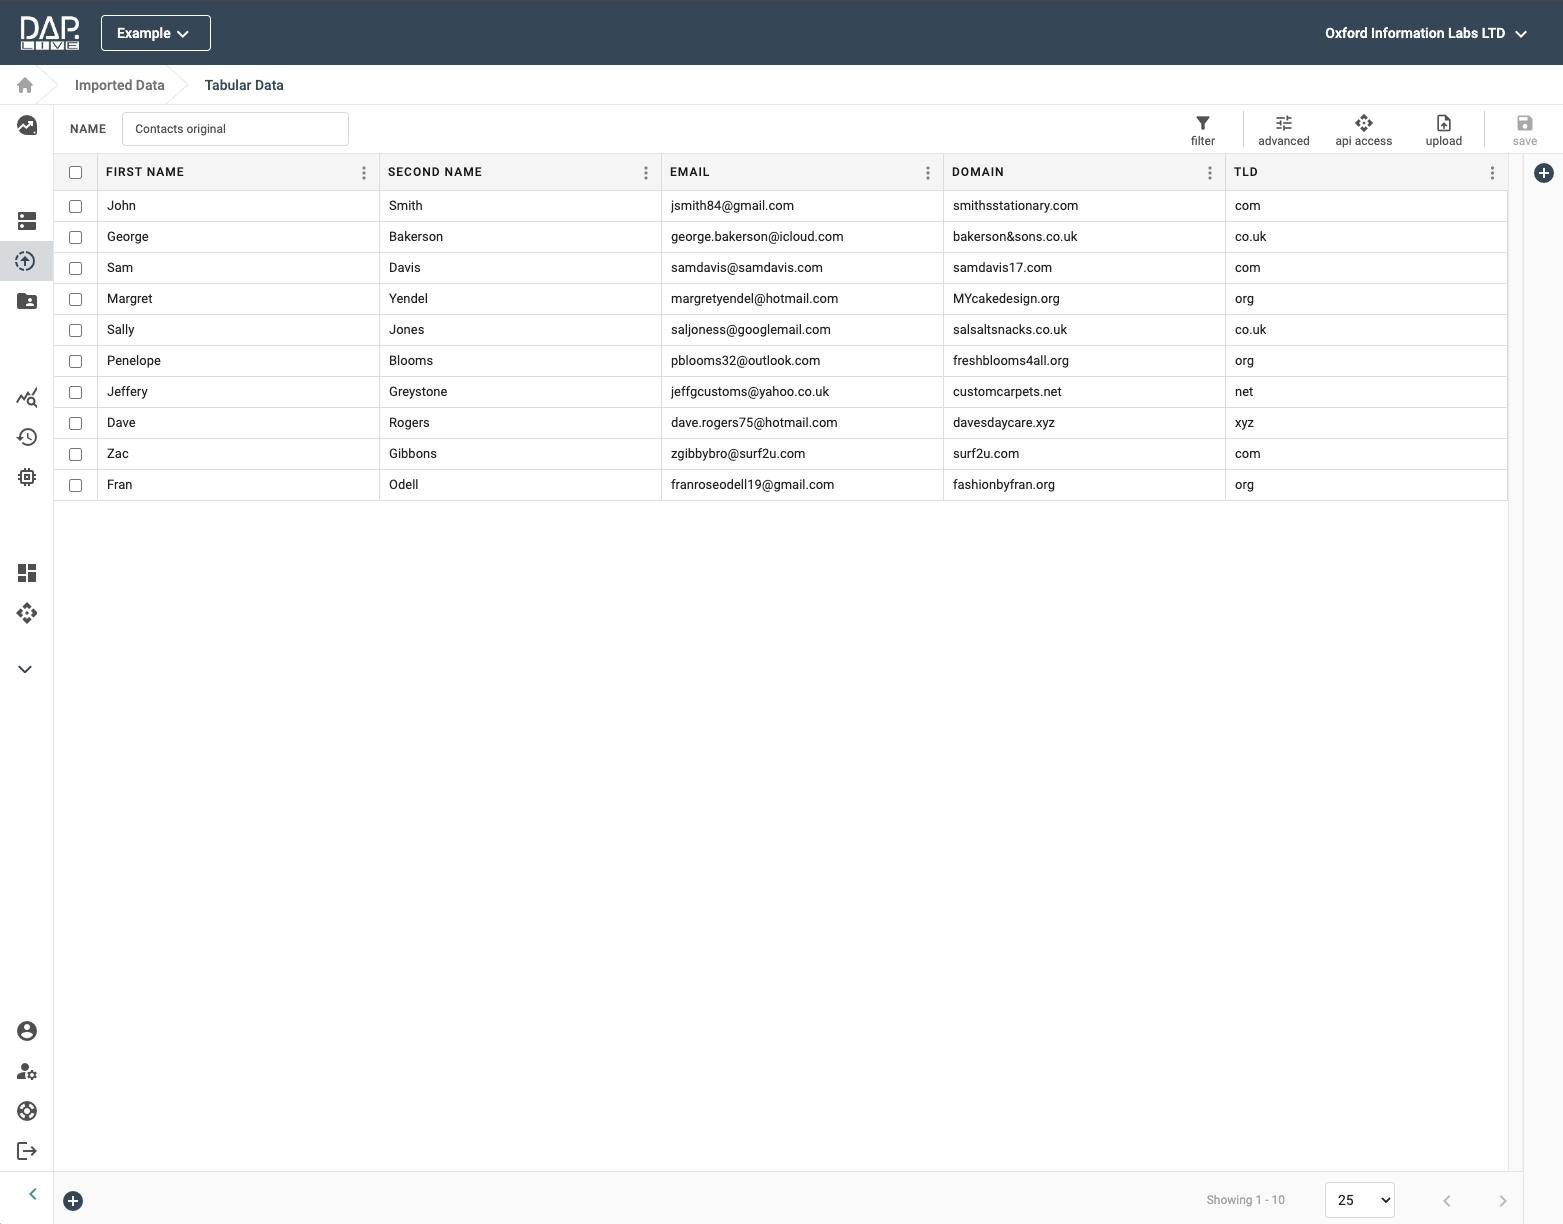
As you can see, our new data entries have been added onto the end of our original datasource.
